Appearance
Eos Console Link
Being able to exchange information between Lightwright and Eos Family Consoles is a fantastic tool. Lightwright supports both Cue List/Cue exchange as well as exchange and creation of Groups. These functions are accomplished by networking by OSC (Open Sound Control), even if you have both applications running on the same computer. It's easiest if you are signed onto a network, but you can use 127.0.0.1 (the foldback IP address) if you can't sign onto a network. Your IP scheme will need to be complimentary for this to work.
Have Eos on and in the current show file. Lightwright should be in a complimentary IP address and subnet and on the lighting network. If you are unsure what IP address/subnet the console is, ask your Programmer. If you are the Programmer-- clear your command line and press About. The information shows up in the CIA area. It's important to know that Eos can be present on many networks at once. Your programmer will know which you should use, as they may limit which network ports have OSC turned on and accessible.
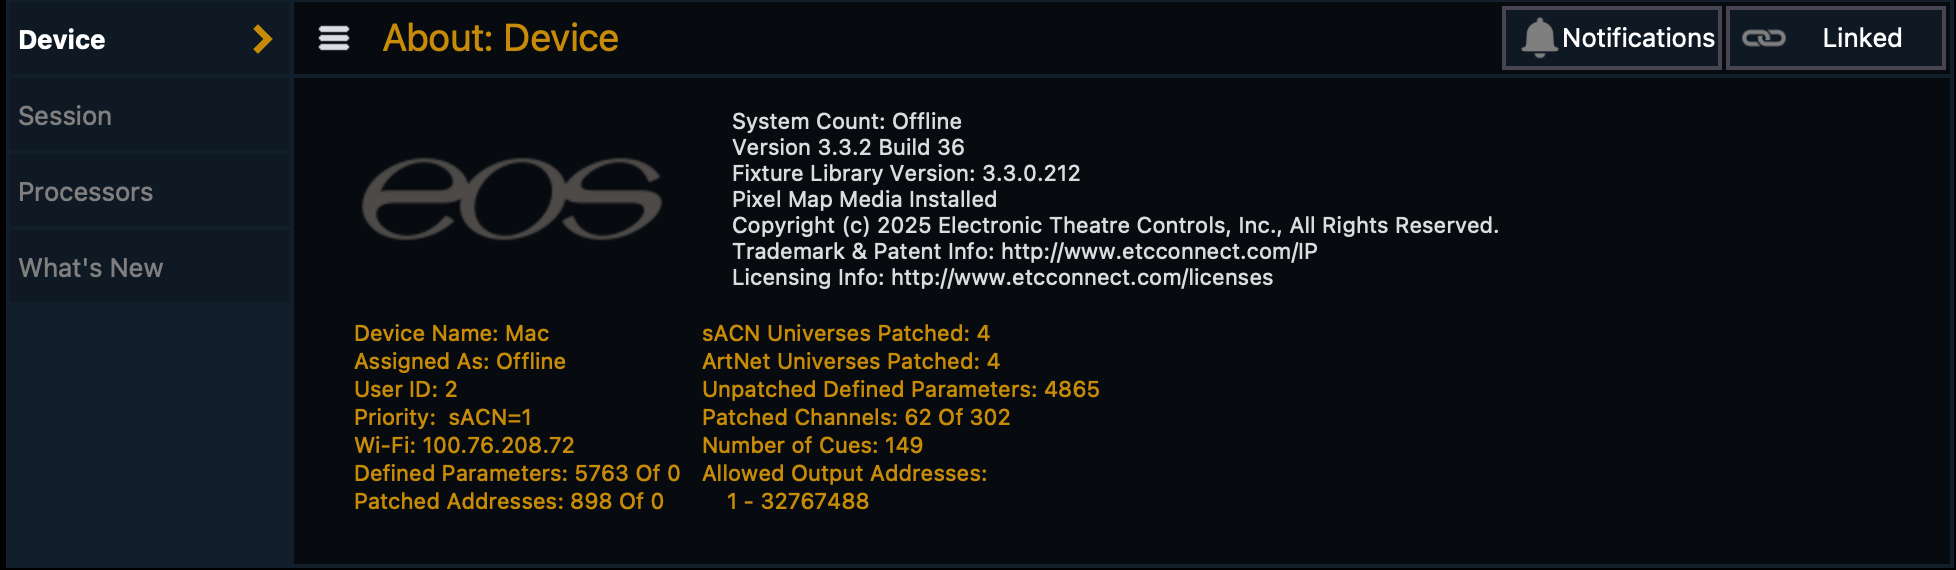
This setup is Nomad running on a WiFi network.
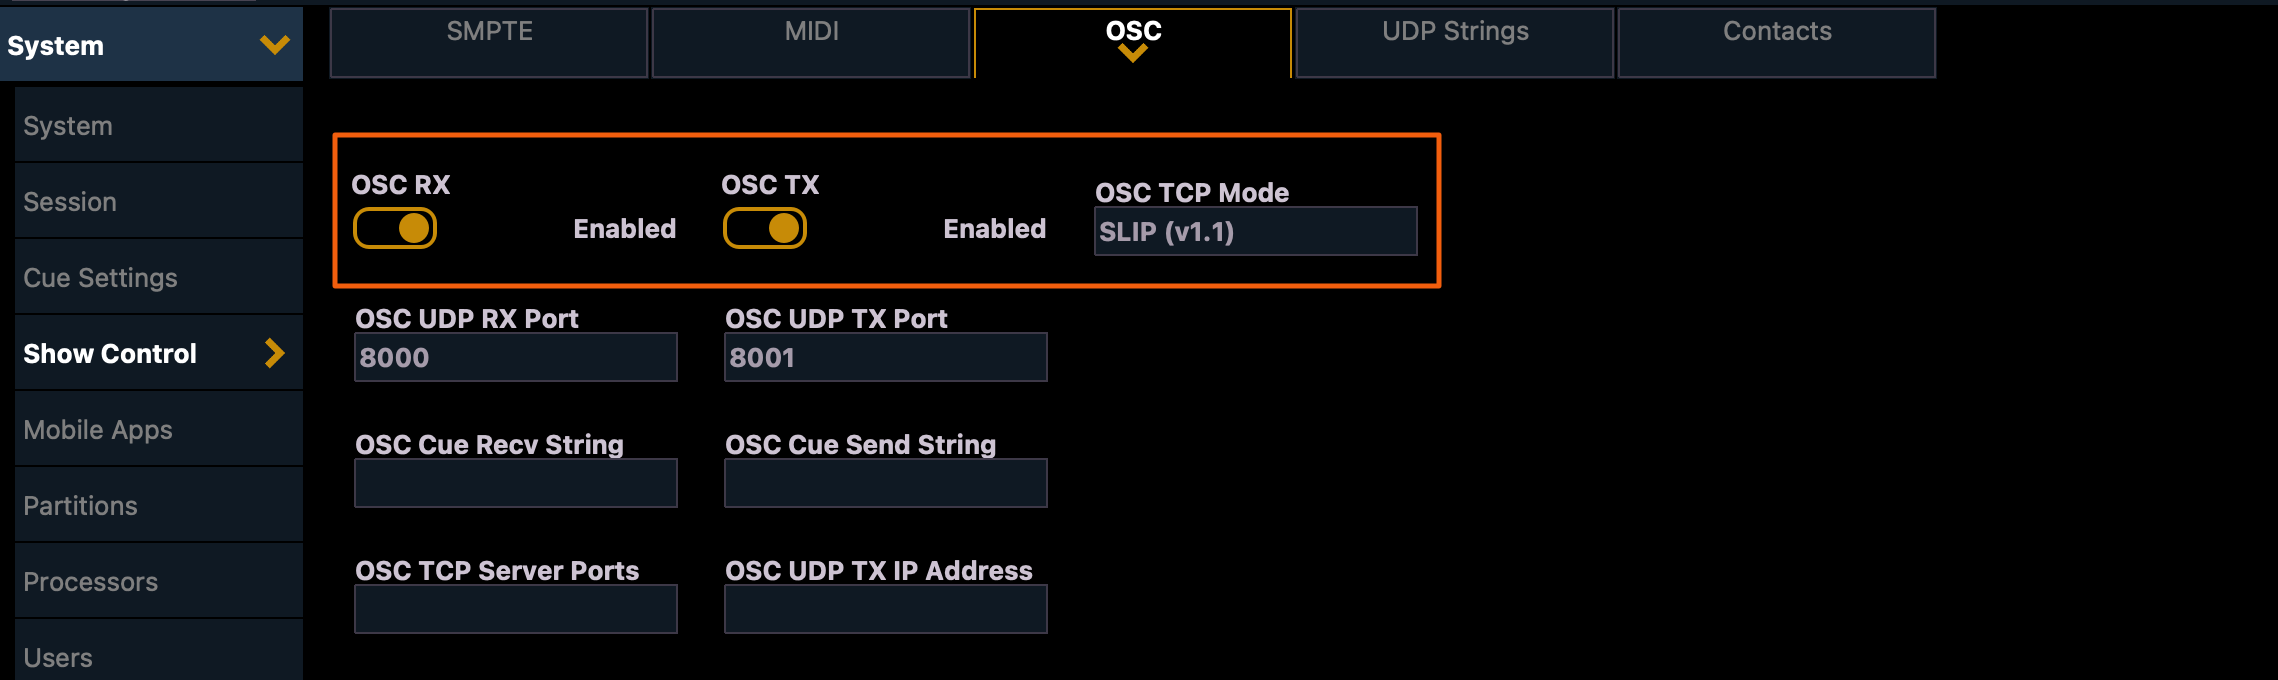
While you are in Eos, we need to check two areas to make sure Eos is open to Lightwright communicating. Go to Setup>System>Show Control>OSC. Make sure your OSC RX and TX are turned on and your OSC TCP mode is set to Slip (v1.1).
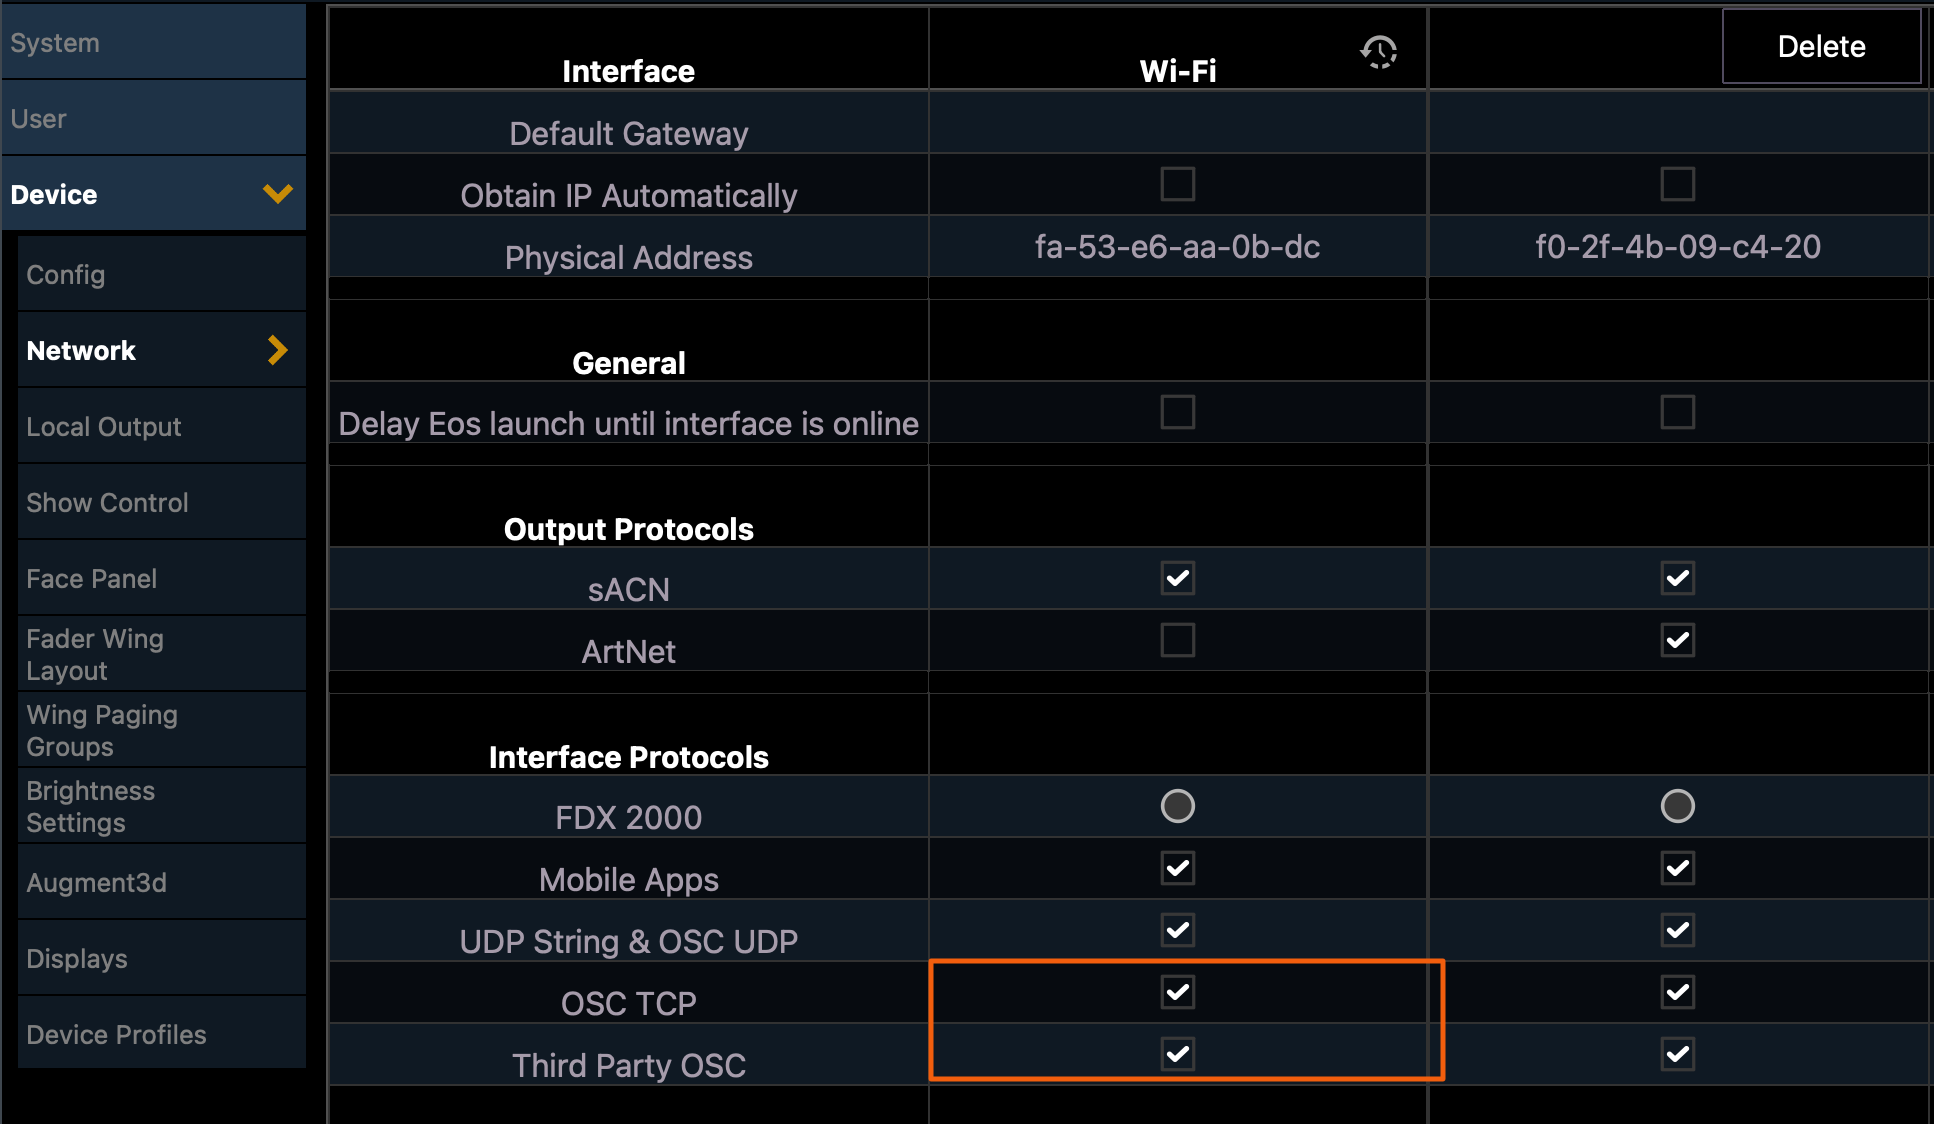
Next, go to Setup>Device>Network to make sure OSC is turned on for your active Network port.
In LW, press the Eos Console Link icon ![]() . This opens the Console Management Tab.
. This opens the Console Management Tab.

To start, touch Add Your First Console 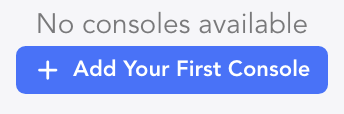 By default, Lightwright will anticipate you are using the foldback option (127.0.0.1- which is what you use when you have no network present).
  Take a moment to name your console (showing here as Laptop Foldback). Touch
  Add. The console is added, but isn't yet connected.

Note the pencil icon, which allows you to edit your console(s) at any time.
Console Cue Lists
Making sure the preferred console is selected, press  Connect. Once connected, options appear.
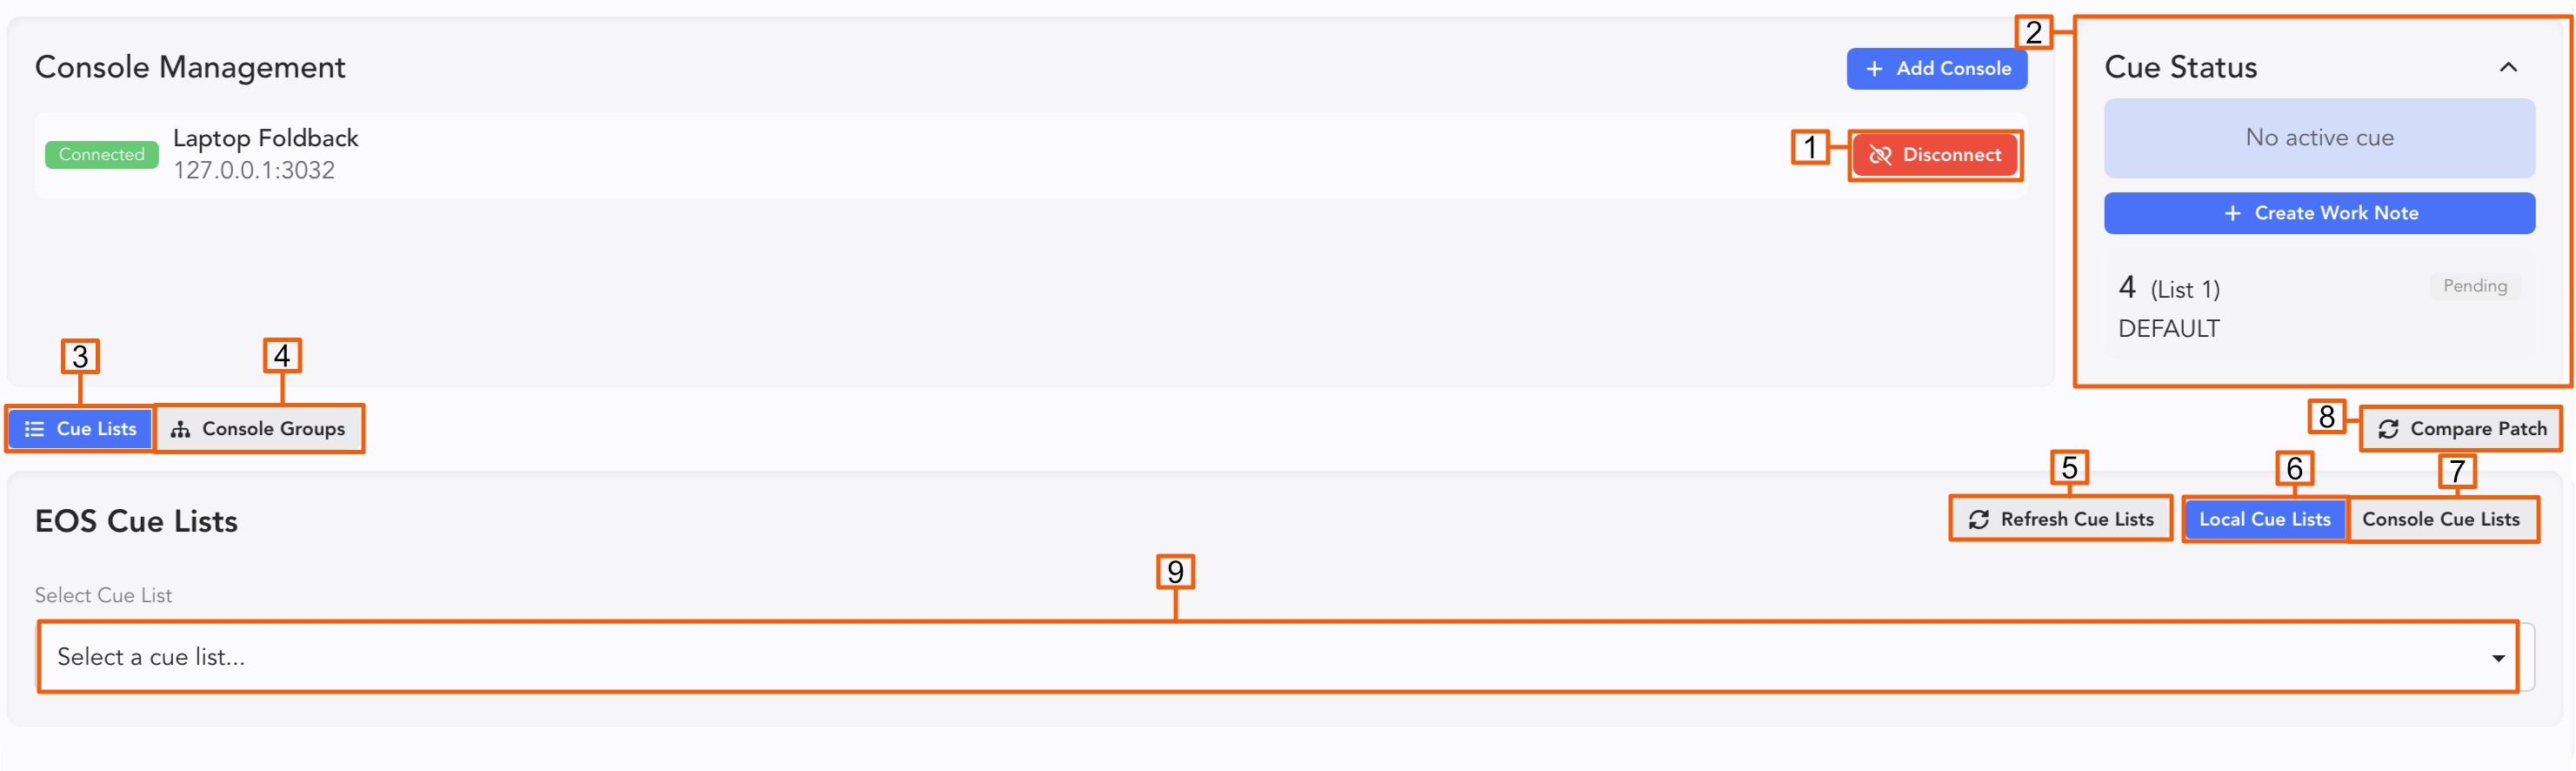
Connection Status
Cue Status which shows Current and Pending cues for the selected List. Also- take note of the new function to add a Work Note to a Cue!
Cue Lists-- Select to show Cue List options
Console Groups-- Select to view Console Groups options.
Local Cue Lists-- Lists you have imported to the Show file
Console Cue Lists-- Cue Lists on the Console
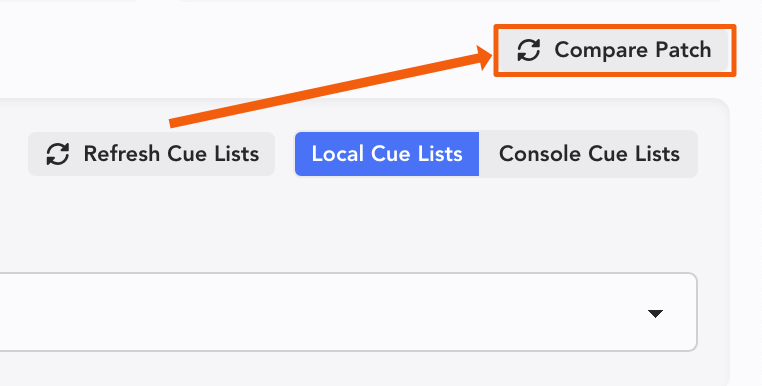
Refresh Cue Lists-- if you rename a Cue List after Lightwright is linked to the Console, the name may not be updated in LW and is therefor not selectable. Touch this to update your Cue Lists.
Compare Patch-- Reconcile your Lightwright and Eos patch. This function also allows you to import any fixtures in Eos that are not in Lightwright.
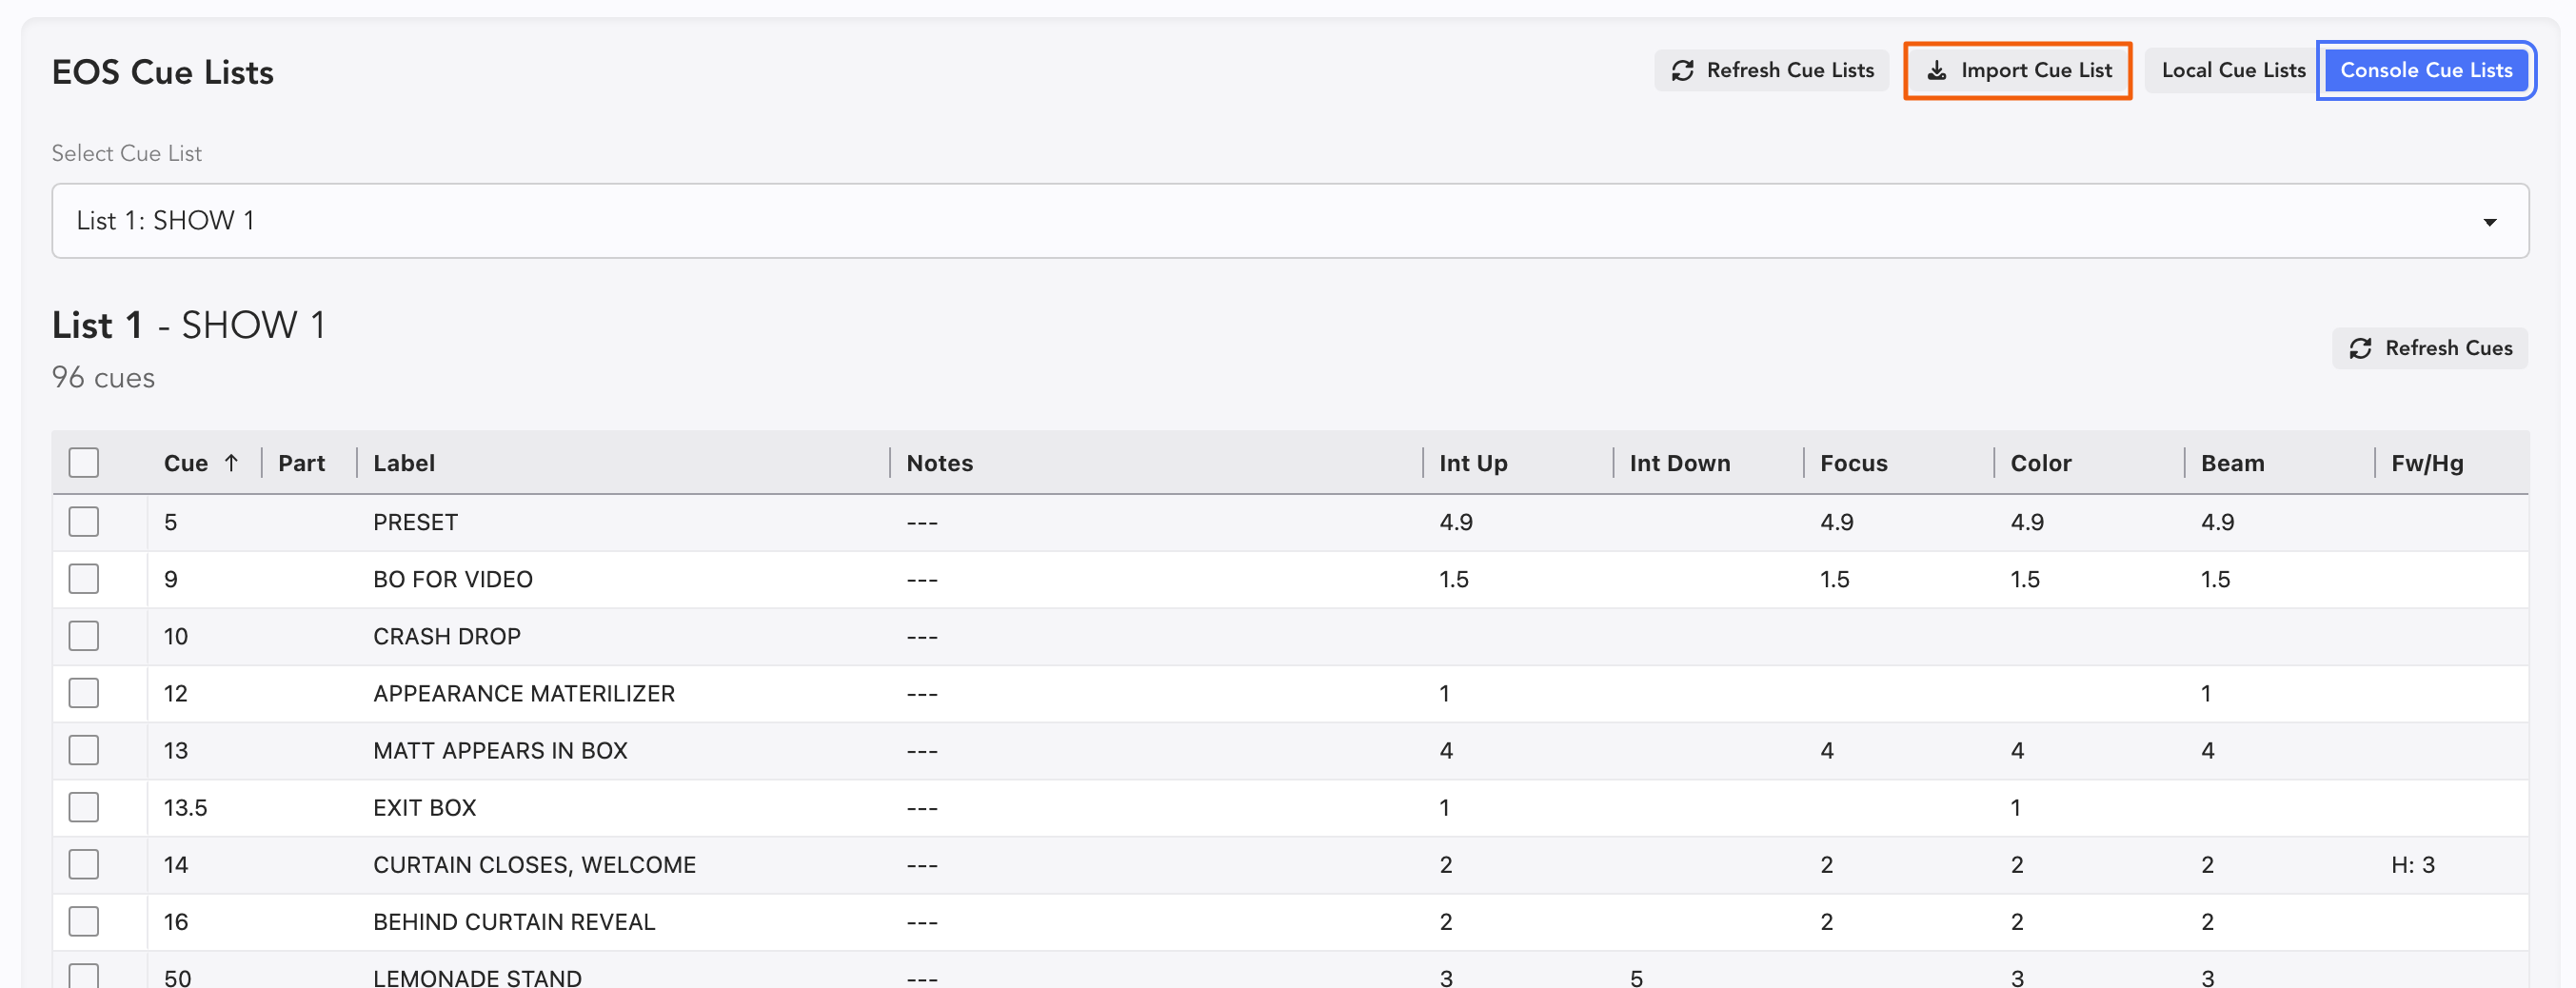
Select the Cue List you wish to interact with from the console, or locally.
Once you've selected a Cue List, the Cues appear in LW. You may now touch Import Cue List to import the data.
This will open a popup where you can choose between three options:
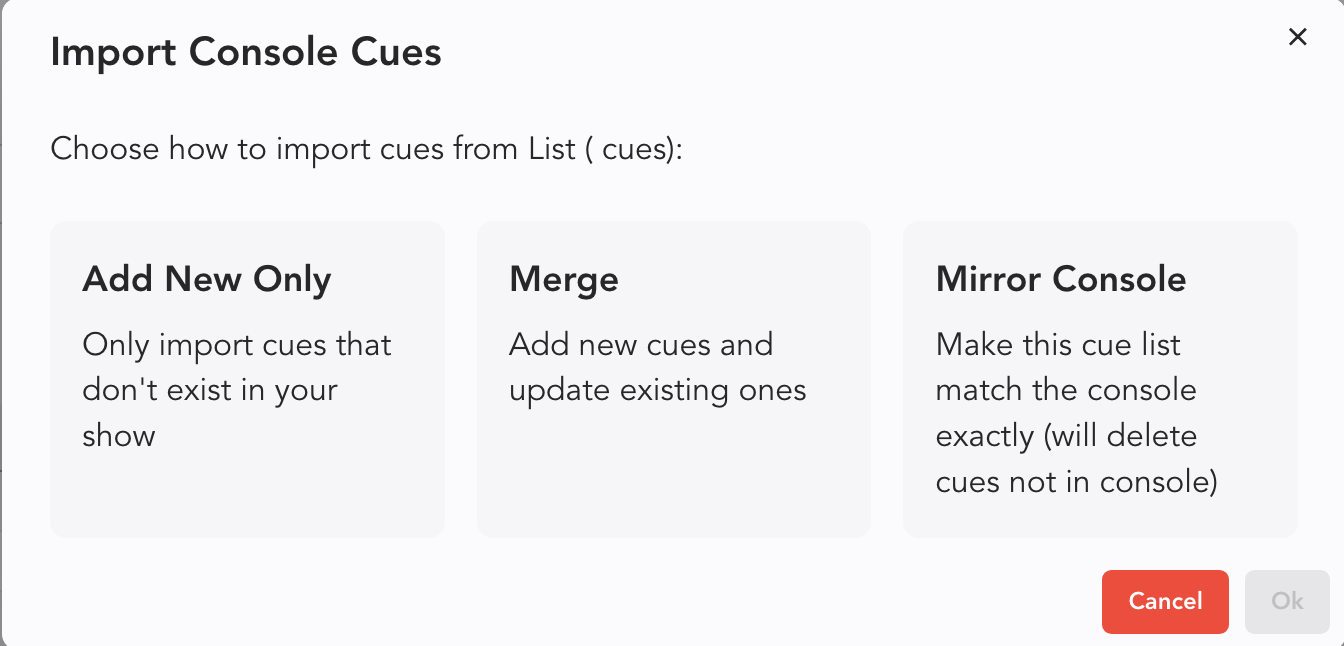
Add New Only-- will only add new content from the console.
Merge-- the safest option once you have your Cue List imported.
Mirror Console-- Overwrite the Lightwwright Cues with what is in the console.
Choose an option and press Ok.
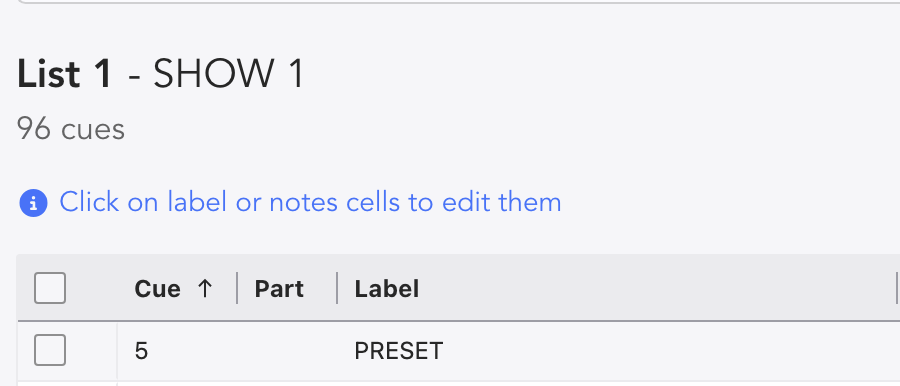
Once imported, you can edit labels and names.
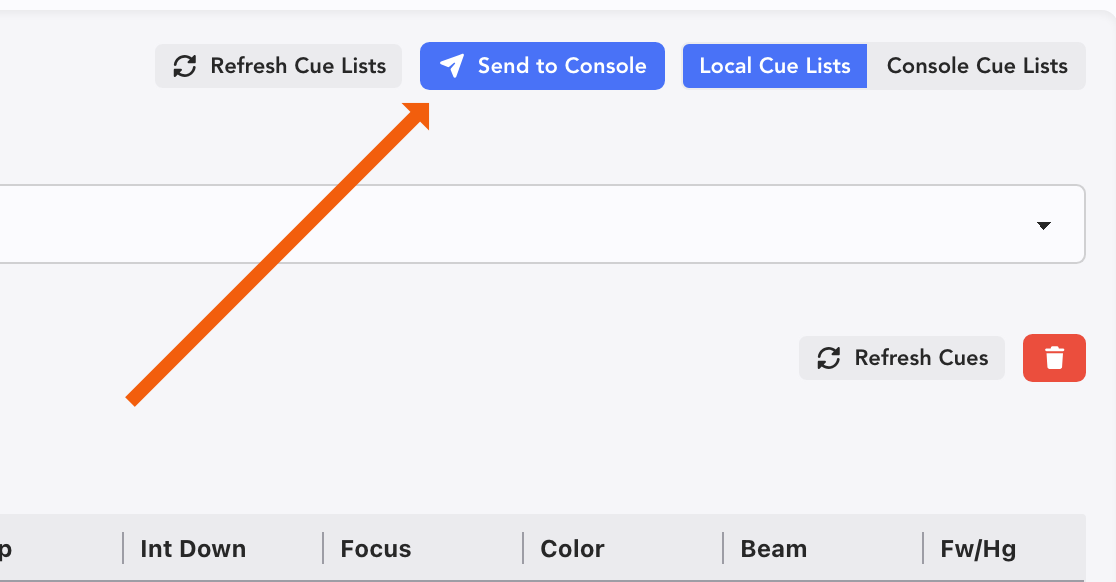
Once you edit an item or more, the area where Import Cue List changes to be a "Send to Console" button.
TIP
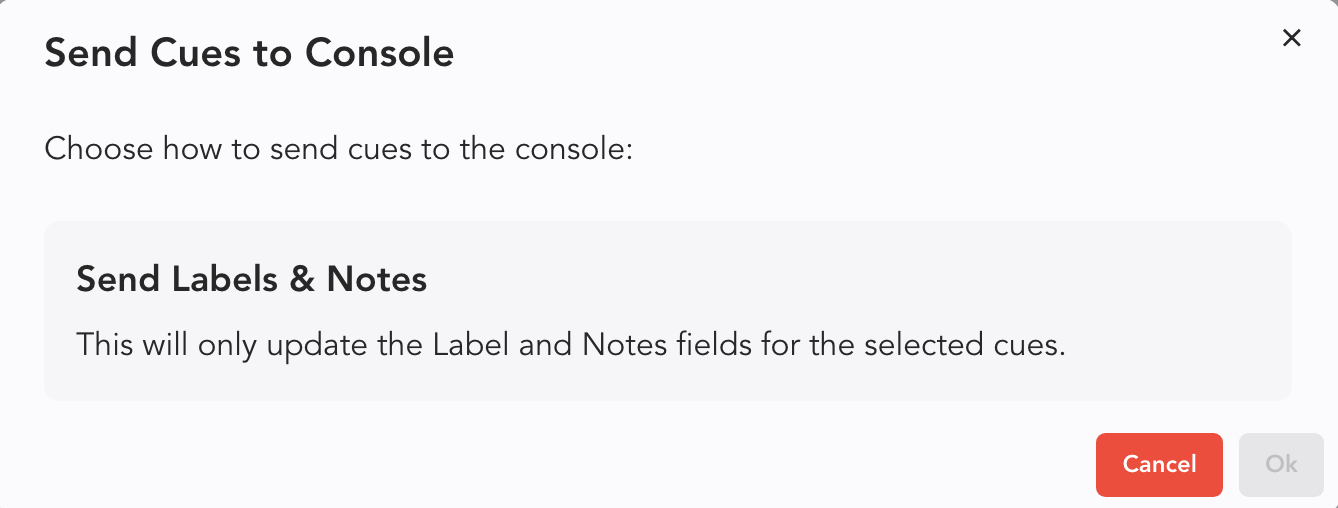
Before you press Send to Console, you need to select a cue or cues, or the whole list to push to the console. When you do, a popup appears. Choose Send Labels and Notes and press Ok.
Console Groups
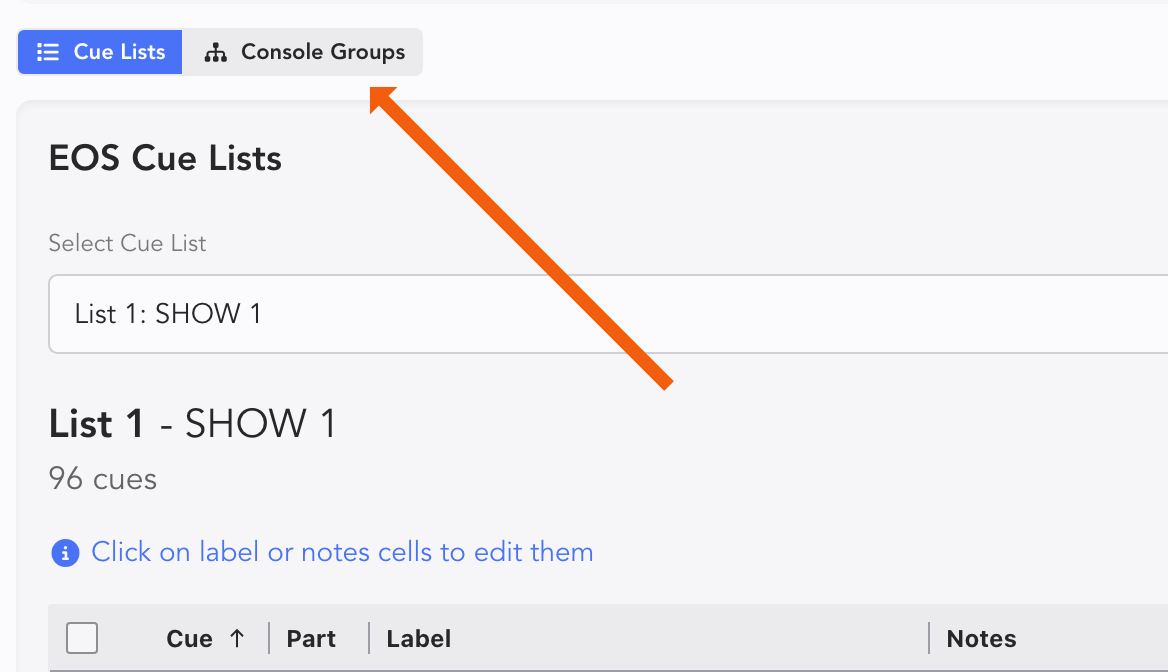
Touch the Console Groups Tab in the upper left of the interface.
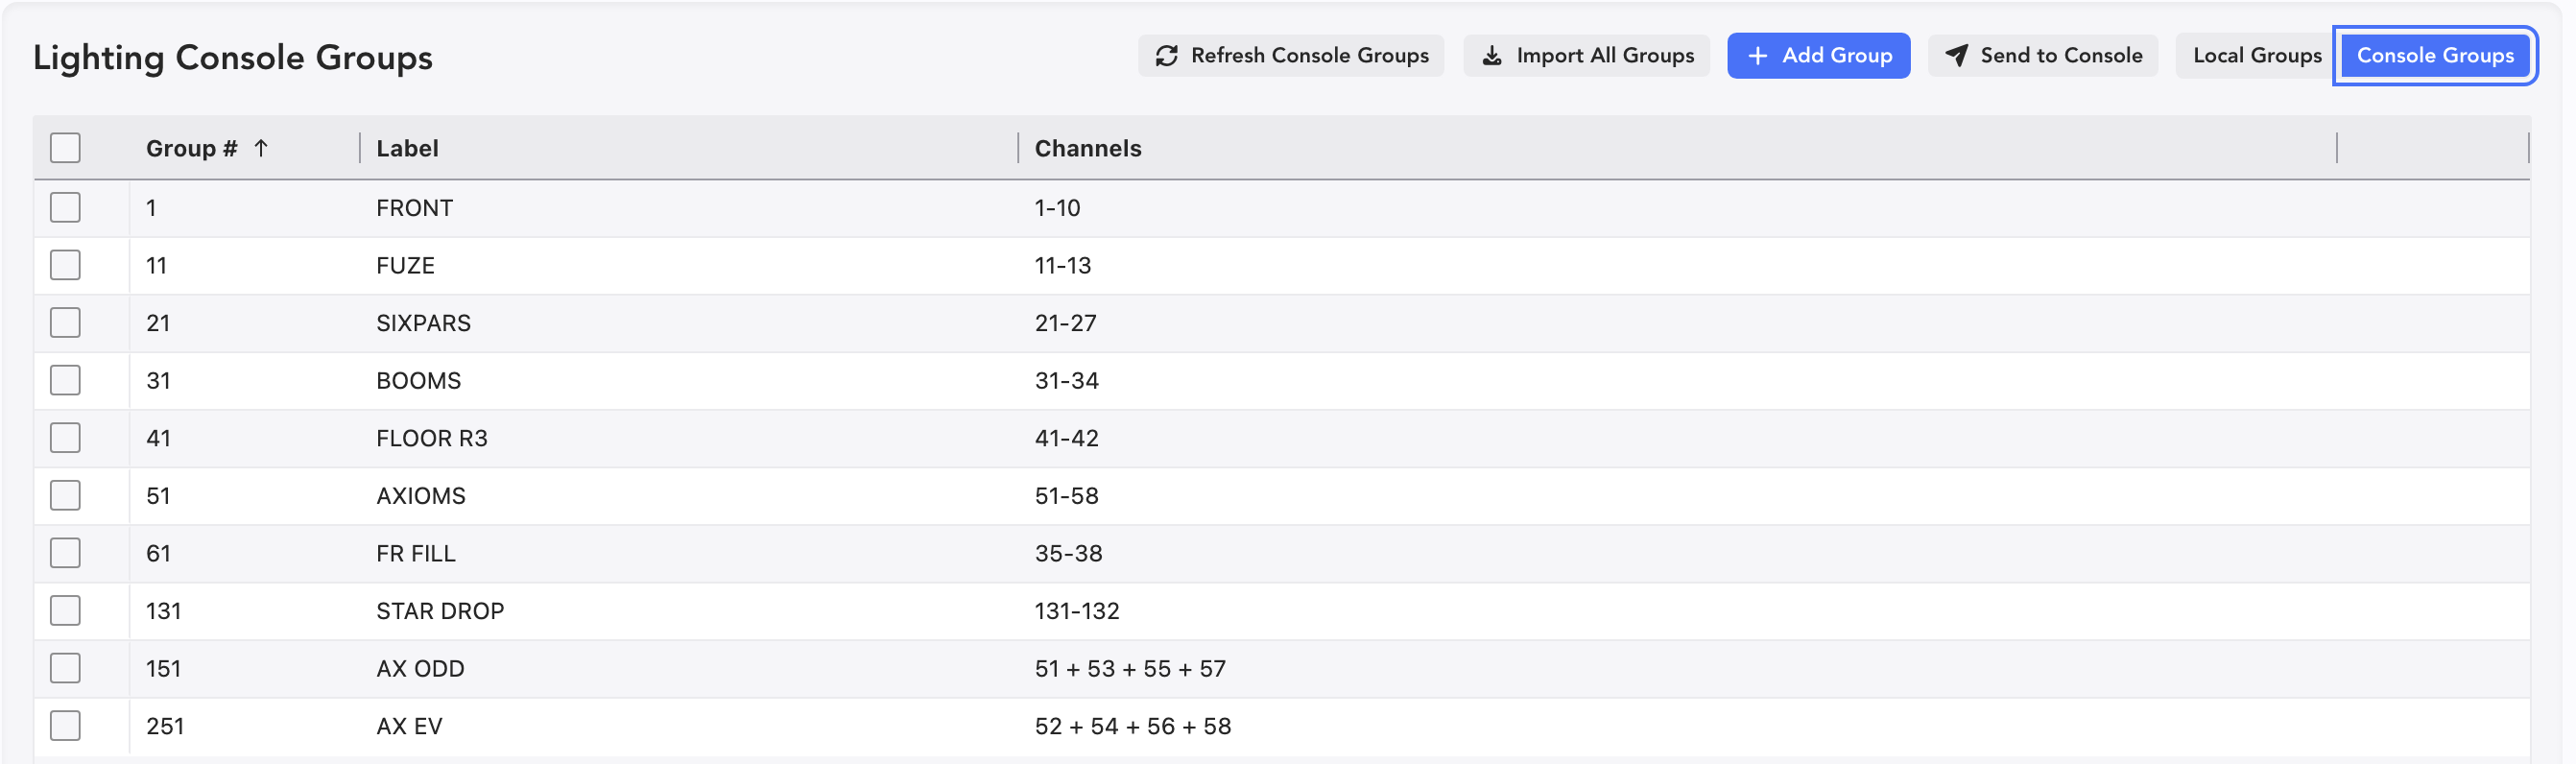
This opens the Lighting Console Groups tab. By default, Lightwright is selected on the Local Groups Tab.
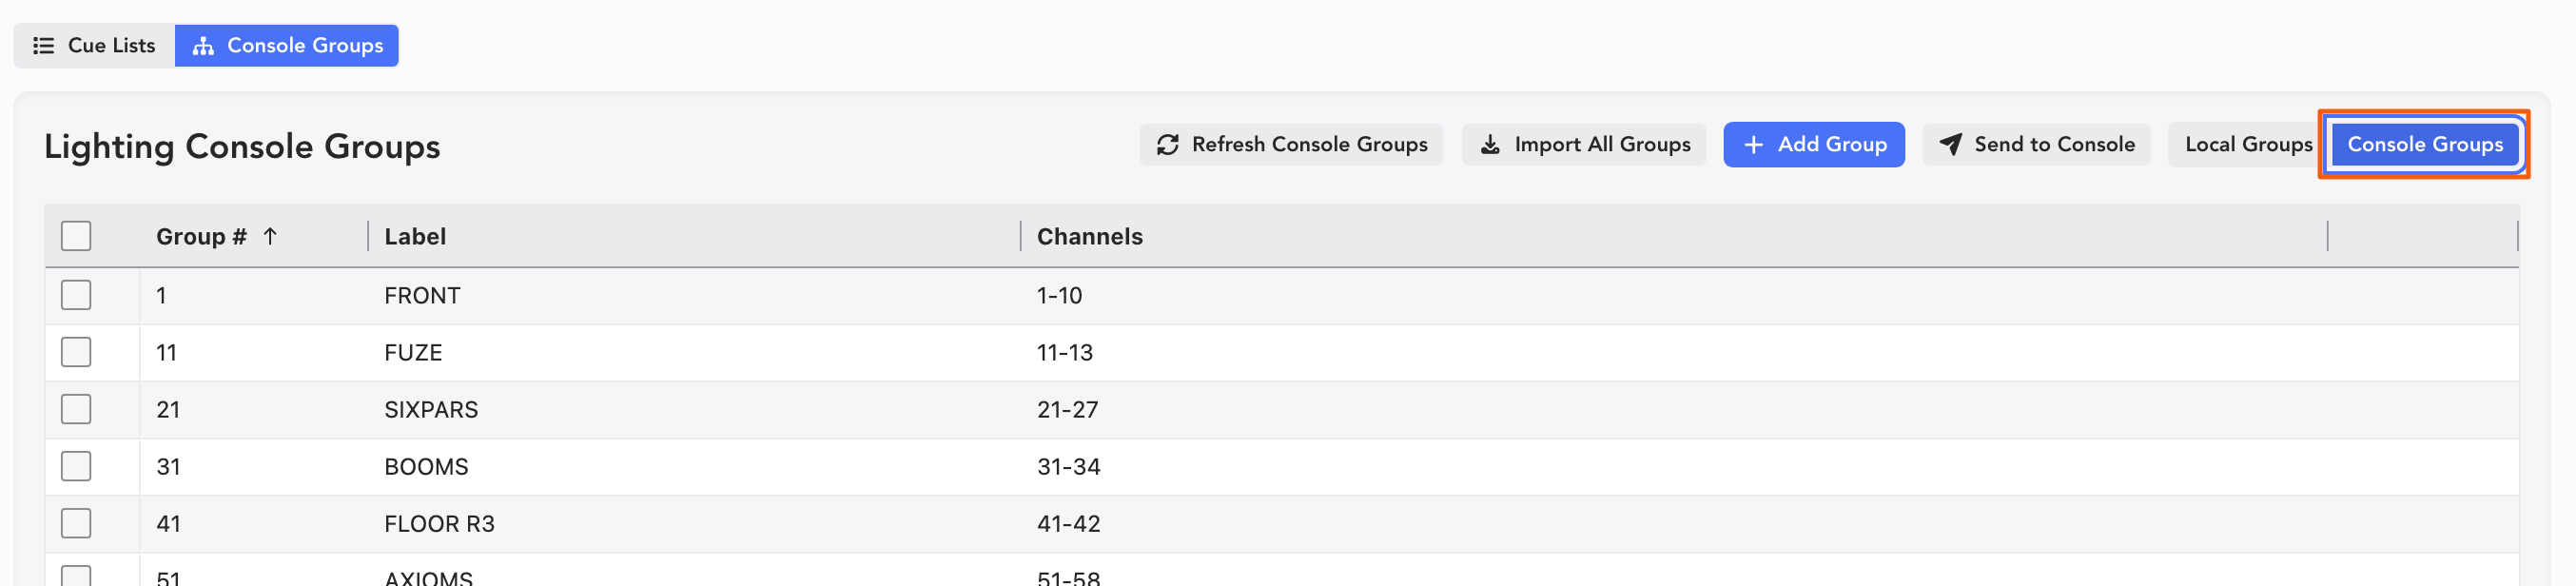
Press the Console Groups button to switch to that view.
Touch Import All Groups  if you have no groups in Lightwright yet. You can also select only the groups you want and import them. A popup appears.
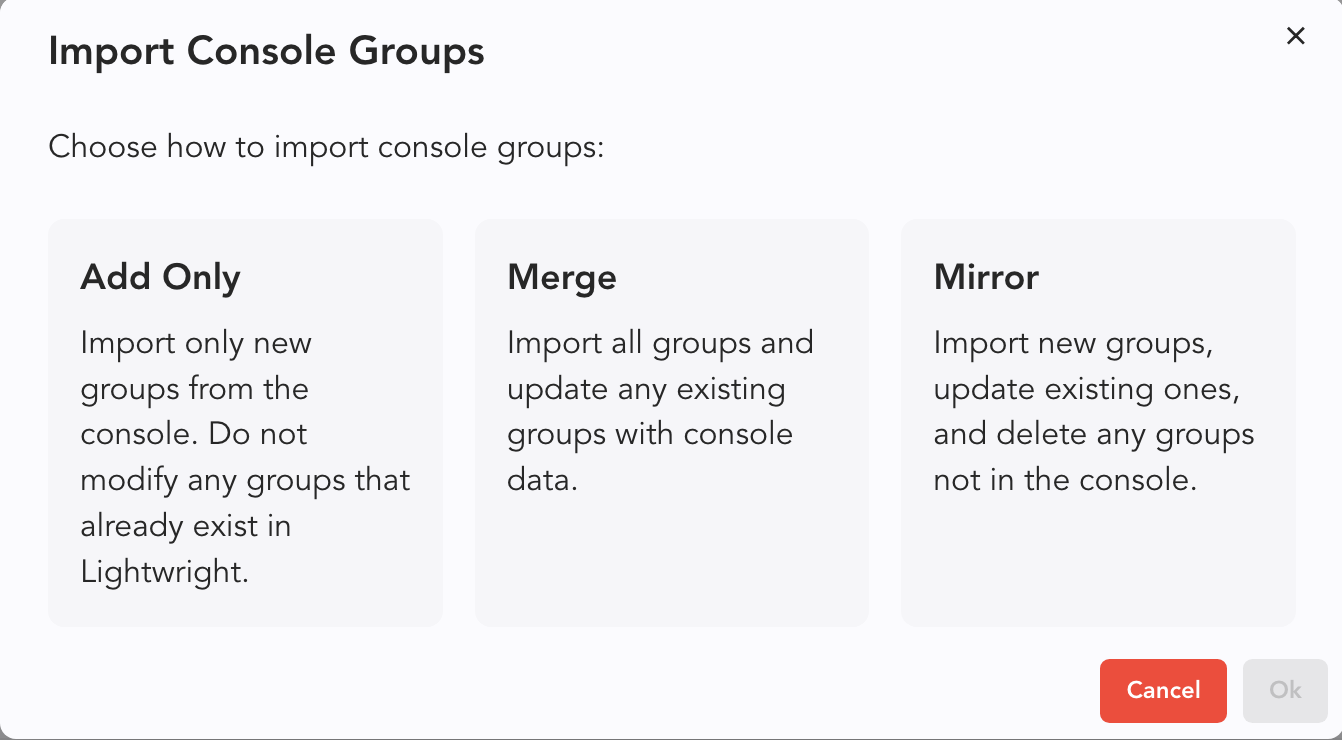
Add Only-- very selective importing of data, just adding new things.
Merge-- mix everything together.
Mirror-- overwrite any data in Lightwright with any and all data from the Console.
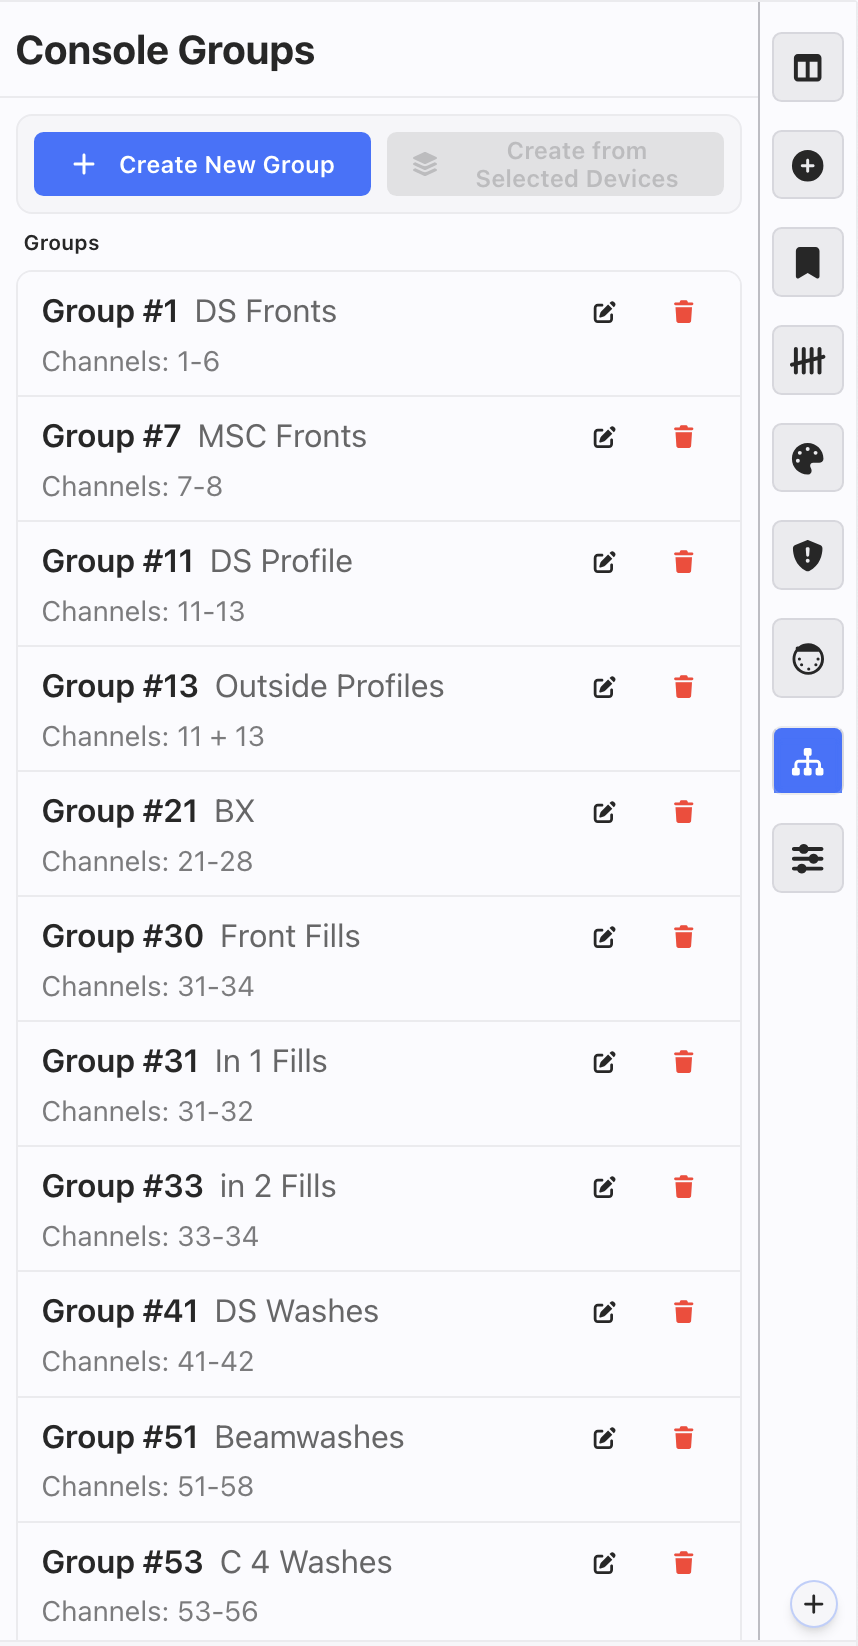
Once complete, make sure you are on the Local Groups tab and all the groups will appear.
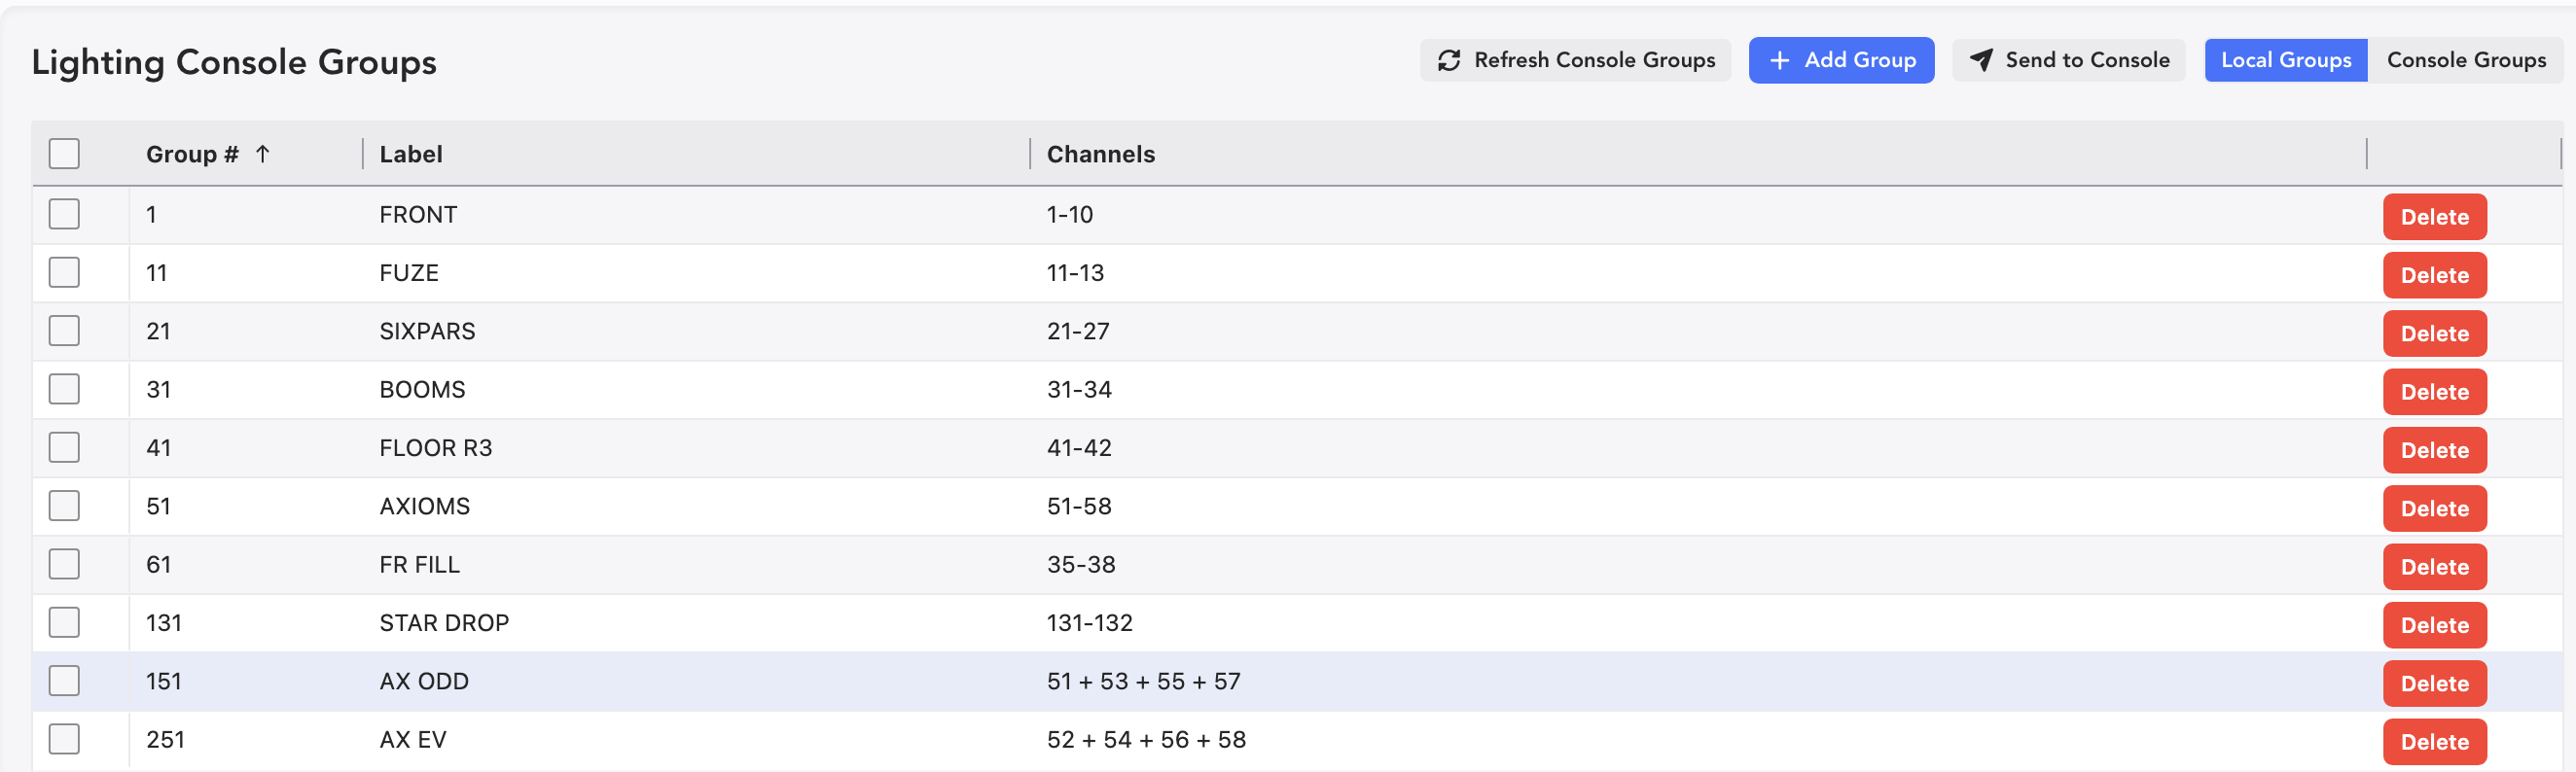
Here, you can change labels and channel selections just by selecting the cell and typing. You can also add groups by pressing the Add Group button 
The new Group is added at the top of the Group List.

Edit a new Group by selecting a cell and typing.
With Eos connected to Lightwright, a new icon appears on the Sidetab in the Worksheet to show Groups.
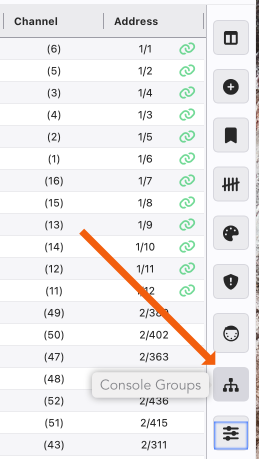
Touching the icon will open a Sidetab in the Worksheet that shows all your Groups, plus a couple other functions.
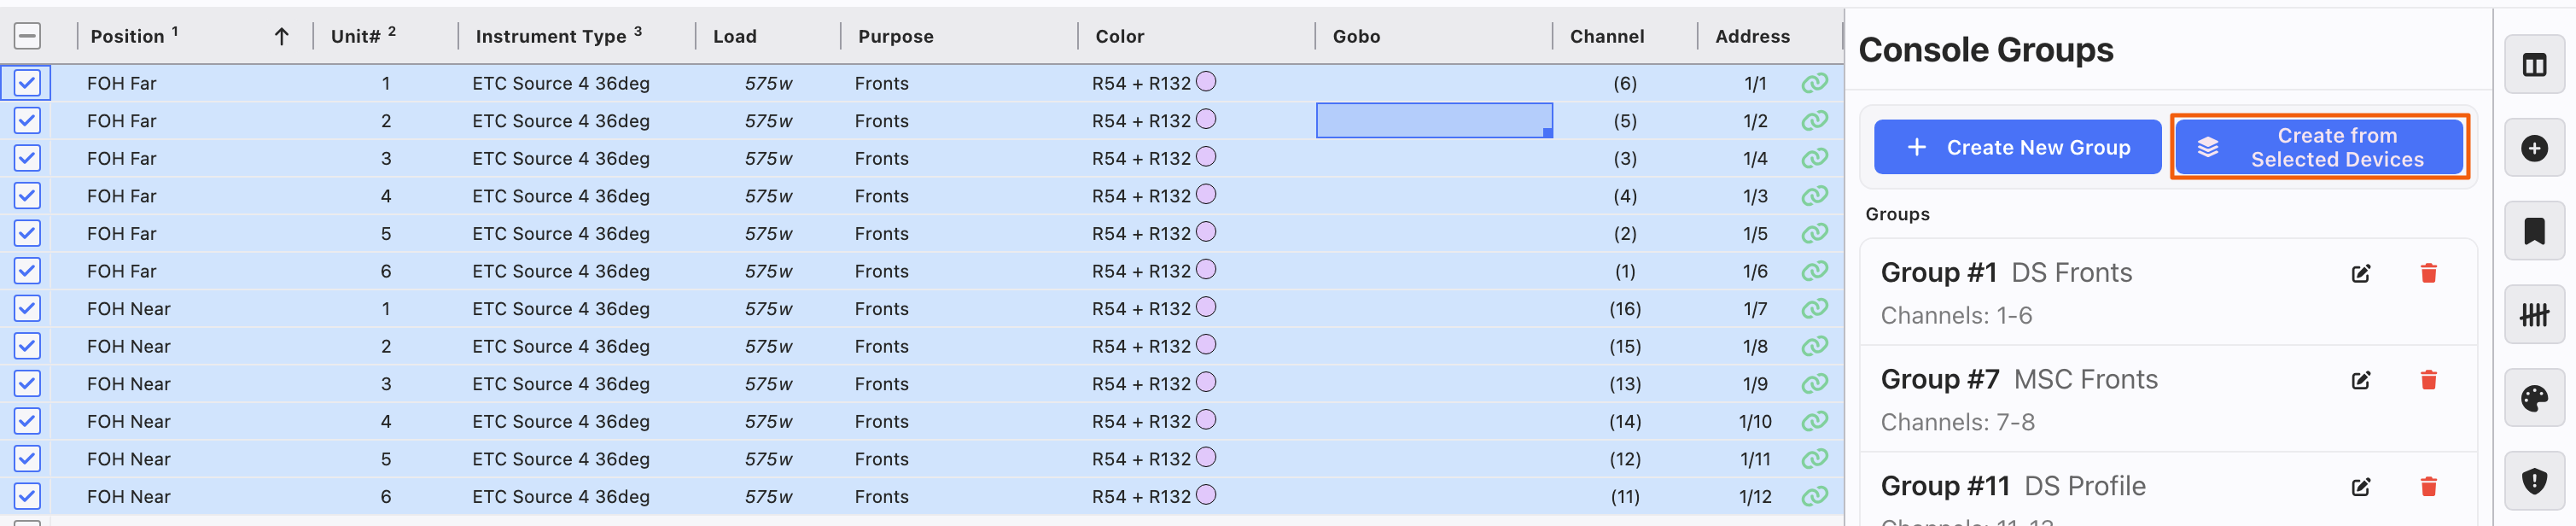
Create from Selected Devices
You can select devices in the Worksheet and create a group from them. This is great for front of house groups, or wing-by-wing groups. Select the devices in the Worksheet with the tick boxes to the left and then press Create from Selected Devices when ready. The Group appears at the bottom of your list.
Send Groups to Console
When you are ready, select your desired Groups and press Send to Console  to send your data back to the Console. A popup appears.
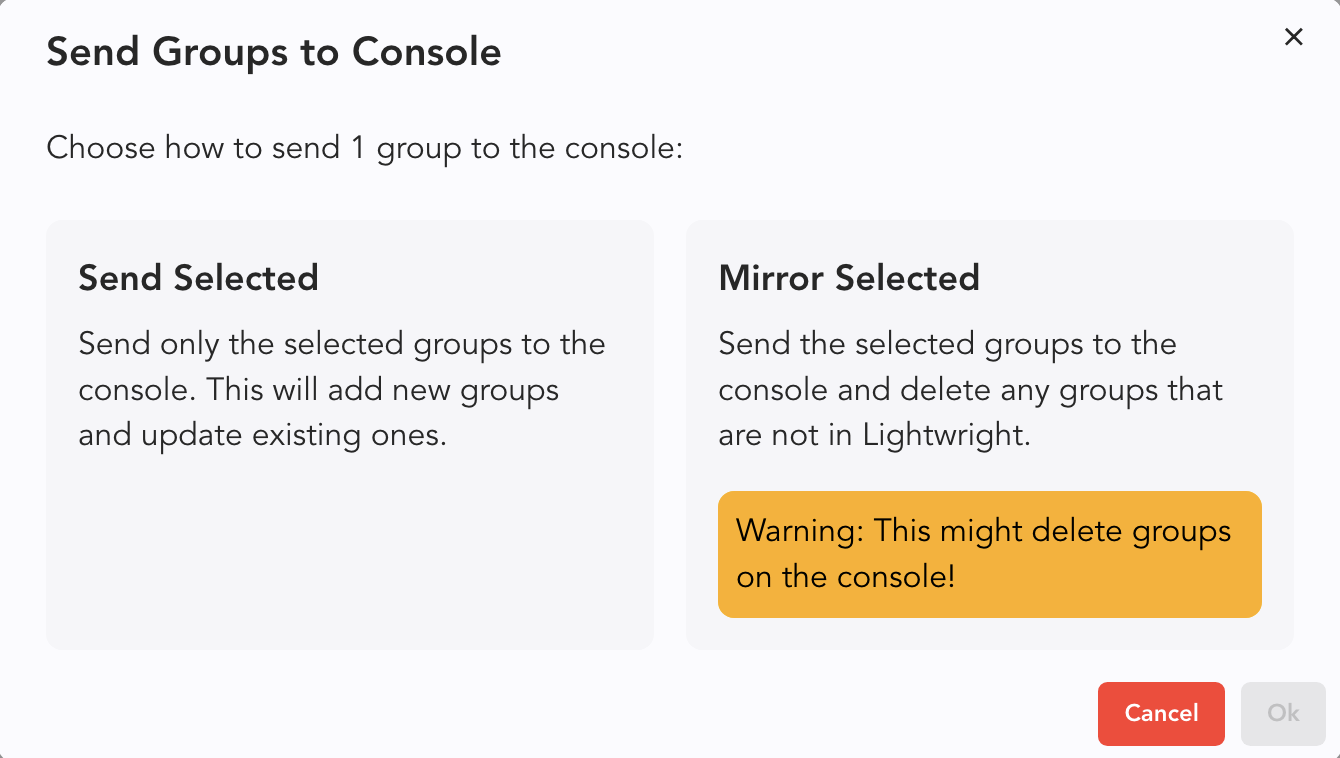
Send Selected is the most moderate way to push your data. It will only overwrite Groups that you have selected to push to the Console.
Mirror Selected overwrites every Group in the console with the Lightwright data. Proceed with caution and make sure your Programmer approves.
WARNING
Make sure all stakeholders in Lighting Control agree before you have Lightwright open and connected to the Console during a preview or performance!
When you are done synching data between Lightwright and Eos, touch the Disconnect button  in the upper right of center of the interface.
Compare Patch
 Comparing and reconciling your patch is available from either the Cues or Groups Tabs. With Lightwright connected to your Console, press Compare Patch. If there are conflicts, a popup will appear.

Just like all conflict popups, choose what line items are good by clicking Add to LW and press Ok to overwrite your Lightwright data.
WARNING
The conflict popup is divided into two sections. At the top are fixtures that are in Eos but are missing in Lightwright. The bottom part of the popup (you may need to scroll down) is where patch conflicts are found.
INFO
If your work flow is just between Eos and Lightwright, you can use this function to import your whole patch from Eos since this function gives you the option to import fixtures from Eos. This gives you patch to paperwork to labels in a very fast process!