Appearance
Cables
A home for all things copper (or nickel, or fiber), the Cable area is as extensive as your productions need. Filters are at the top, as always.

By default, only one filter will apply at a time. By pressing Ctrl/Cmd and clicking a second option, you can view more than one category at once.
Plan
The default view of Cable is the Plan view.
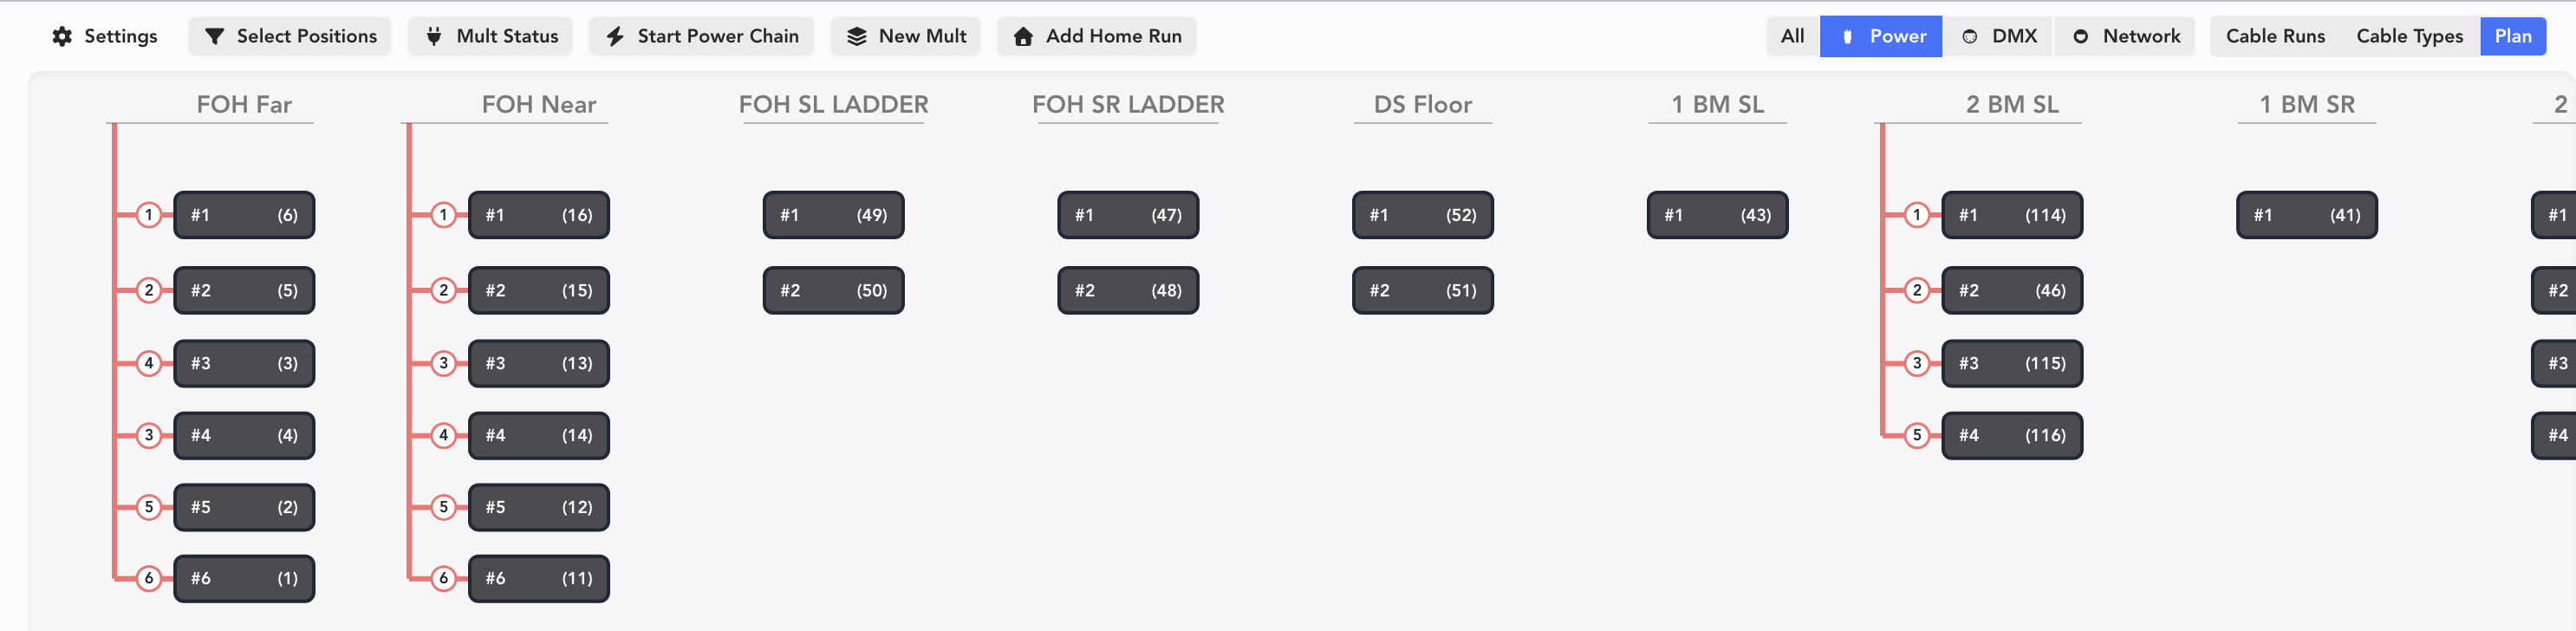
Currently, we are filtered to Power. Shifting to All gives a more complete view of the many functions you can accomplish here.
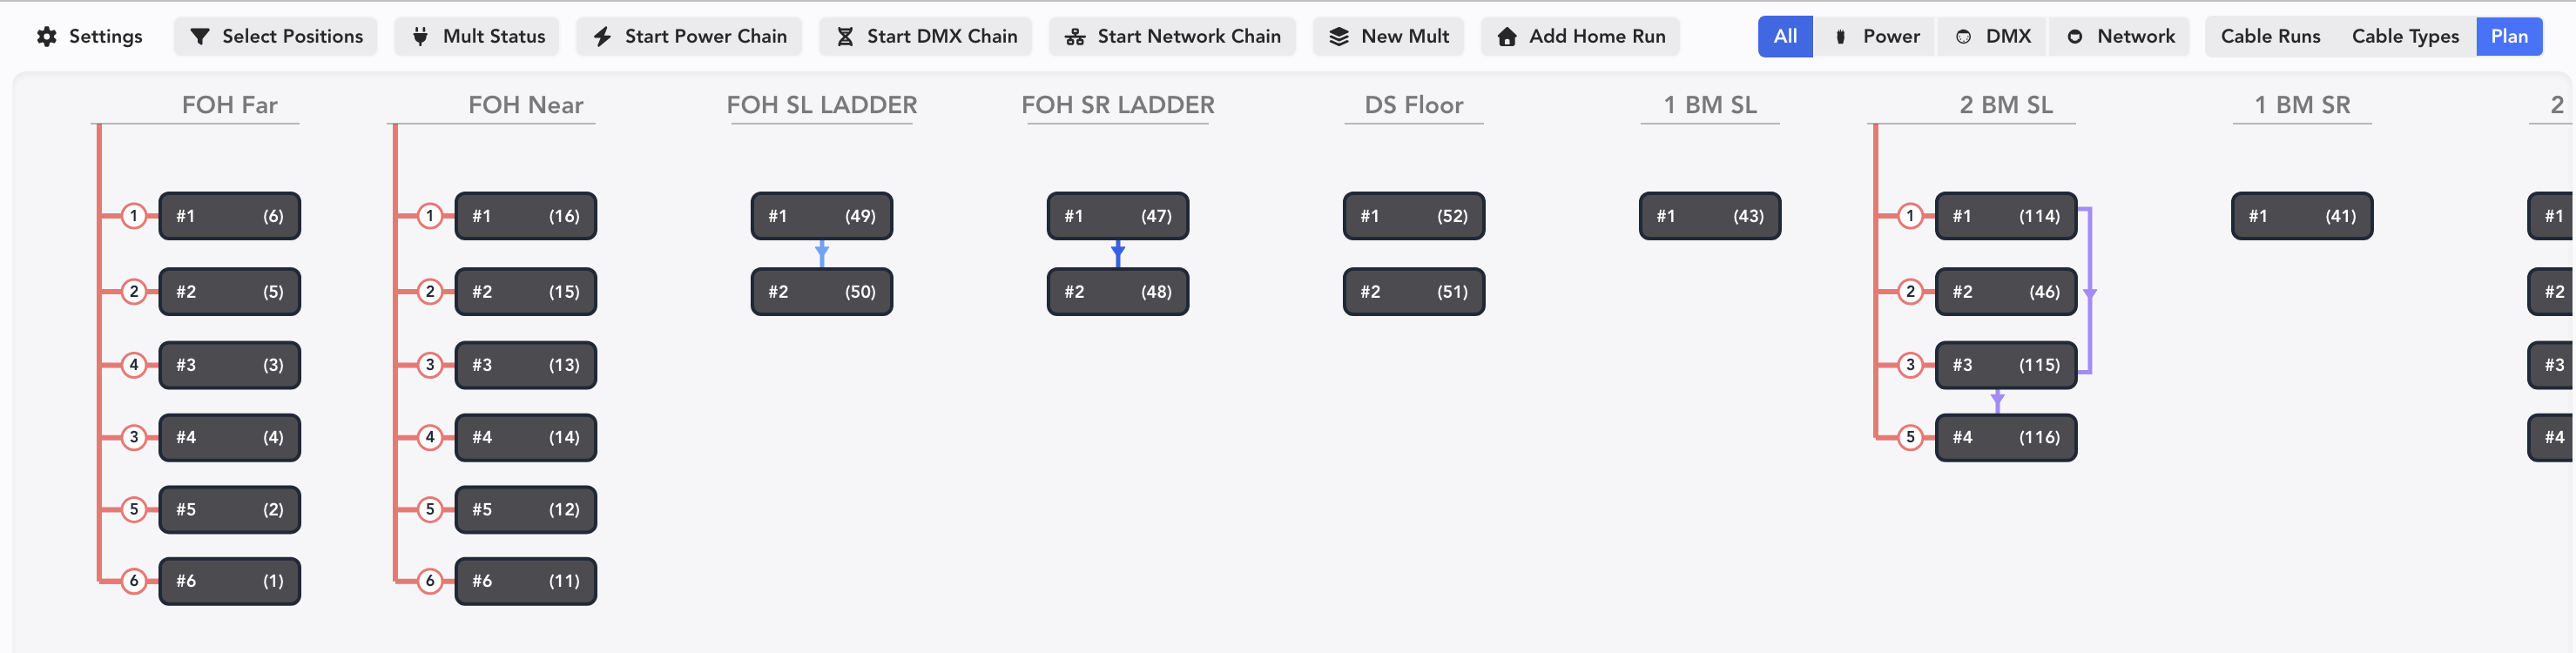
- Items in red are power-related.
- Items in blue are DMX.
- Items in Purple are network.
At the top left are buttons to help you start actions or view data:

Settings-- configure what data shows on the Device Tiles in your Plan.
Select Positions-- opens a side panel to filter what positions you are viewing.
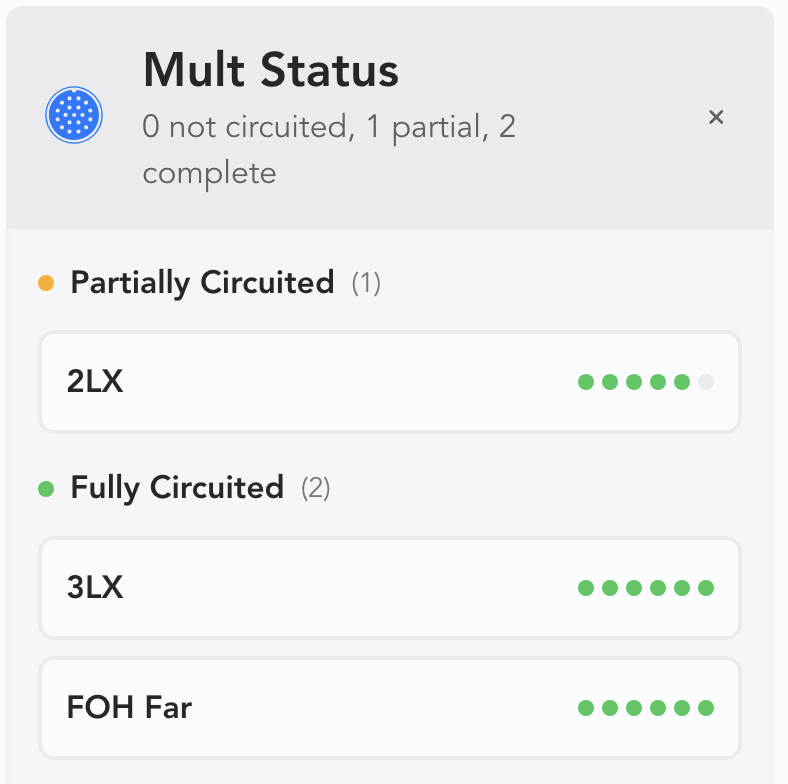
Mult Status opens a Side Panel that tells you if you've finished assigning all of your Mult circuits.
Start Power Chain/Start DMX Chain/Start Network Chain-- all three functions allow you to start a daisy chain.
New Mult-- starts a new Multi.
Add Home Run-- starts a new Home Run.
Worksheet
From the Cable pull-down, choose Cable Worksheet.
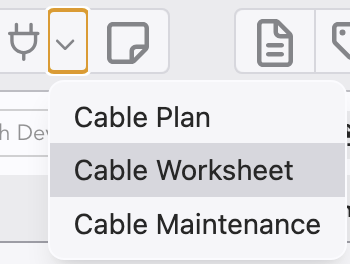
The Cable Worksheet is a spreadsheet-style interface for all your Cables.
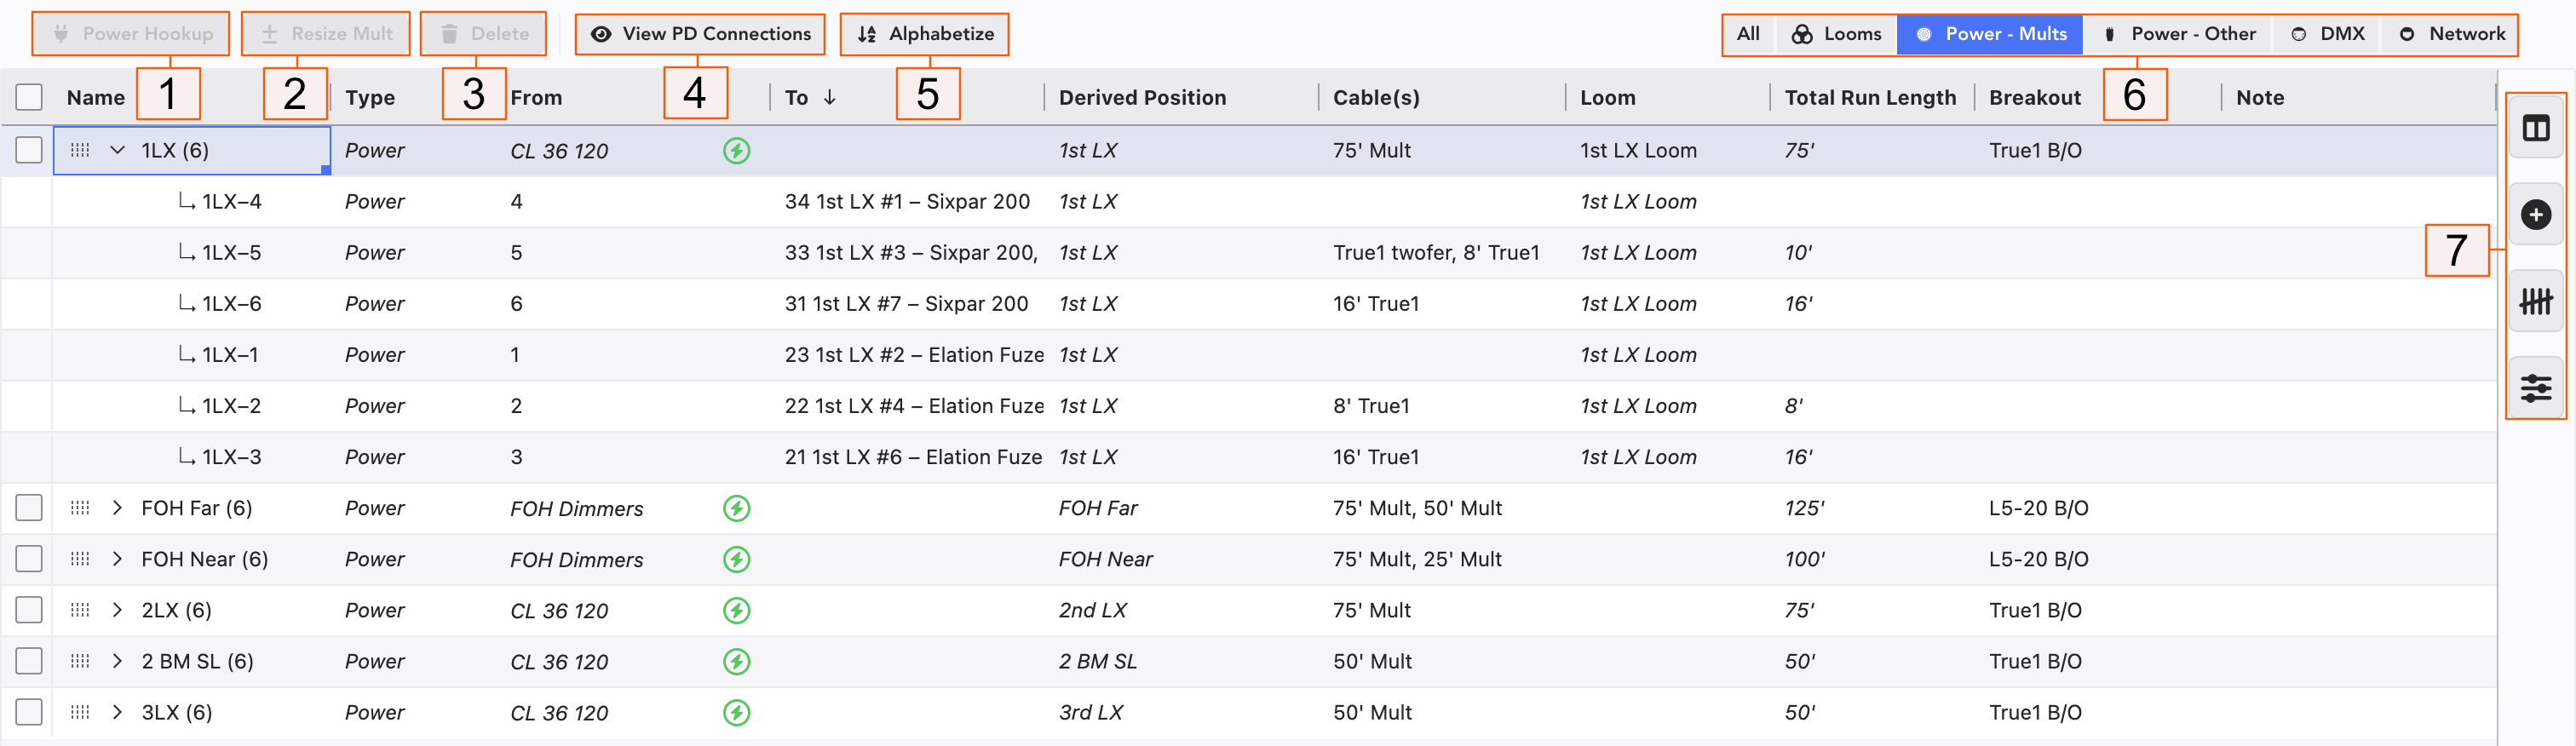
Power Hookup-- Select your Mult and press this to connect your Mult to power.
Resize Mult-- Select your Mult and press this to add or subtract circuits from the default of six.
Delete-- Select your Mult and Delete.
View PD Connections- see the view of your Power Distro without exiting Cable.
Alphabetize-- Sorts your view in Alphabetical order.
Filter your view to just the kinds of Cables you wish to work with.
Columns- choose which columns from the Worksheet to view or hide.
Add Cable Runs-- Similar to Add Device in the Worksheet, use this automated interface to add Cable entries and make numbering a long set of Cables easier and more precise (for example).
Cable Count-- like Live Count, this side view shows Cable counts that are updated as you work.
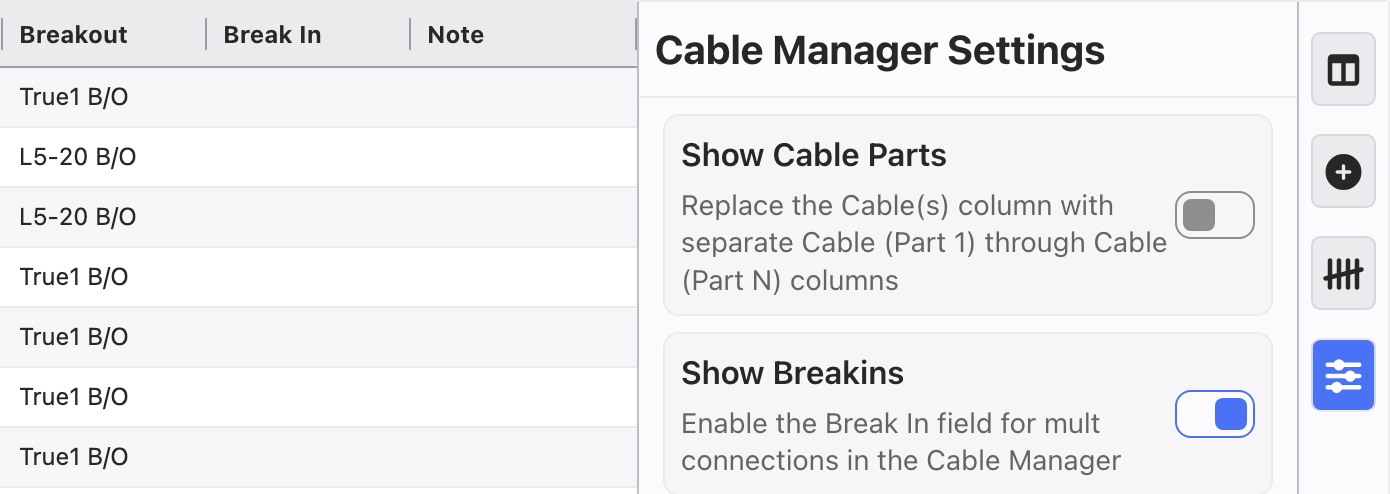
Cable Manager Settings:
- Show Cable Parts adds columns and splits combined entries. Example- you have a Mult made from a 75' and 50' SOCA. This will split the combined entry into multiple columns- Cable Part 1, Cable Part 2. You can also reverse this and add your lengths to the separate columns and Lightwright will combine them in the Cable(s) column. Users can select up to five Cable Parts.
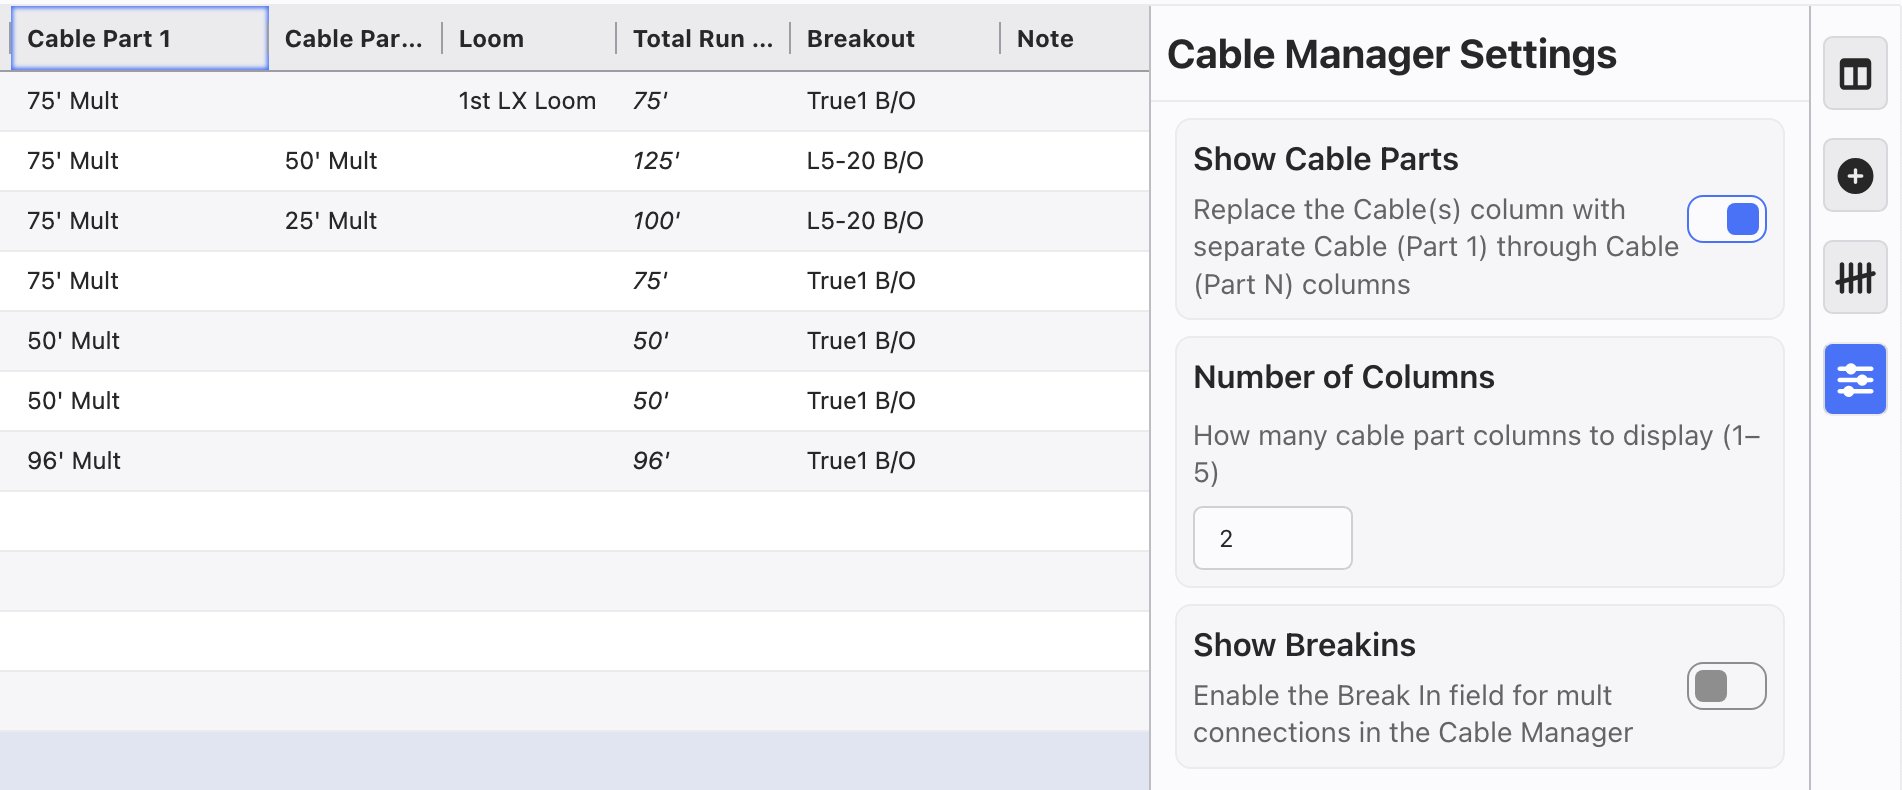
- Show Breakins adds a column for you to input Breakins when needed.
Additional Features
Total Run Length
This new function shows you a tally of combined entries such as 50' Mult, 75' Mult. In the Total Length column, 125' will populate automatically.
INFO
Lightwright will extract length data at the time of entry. At any time, you can go to Cable Maintenance and edit the length value.
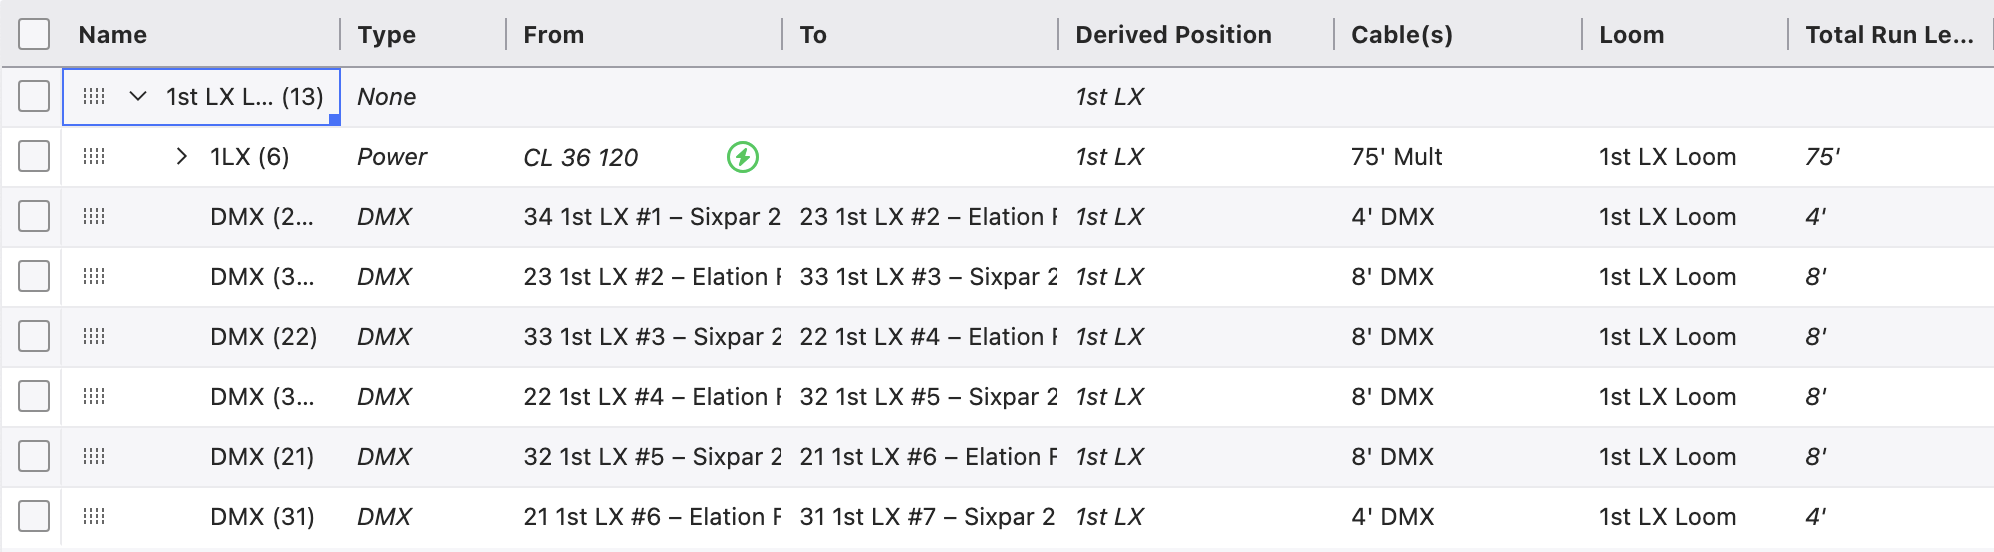
Loom Support
Lightwright now offers Loom support. Group your cable entries for ease of counting and shop pull needs by adding a Loom name. You can filter your view in Cable Worksheet to view only your Looms (show below).
Populate Spare Mult Circuits
For certain work flows, it can be helpful to have all your spare Mult circuits listed in your Worksheet. In this current file, there are three Mults that are not entirely filled, leaving five spare circuits between them.
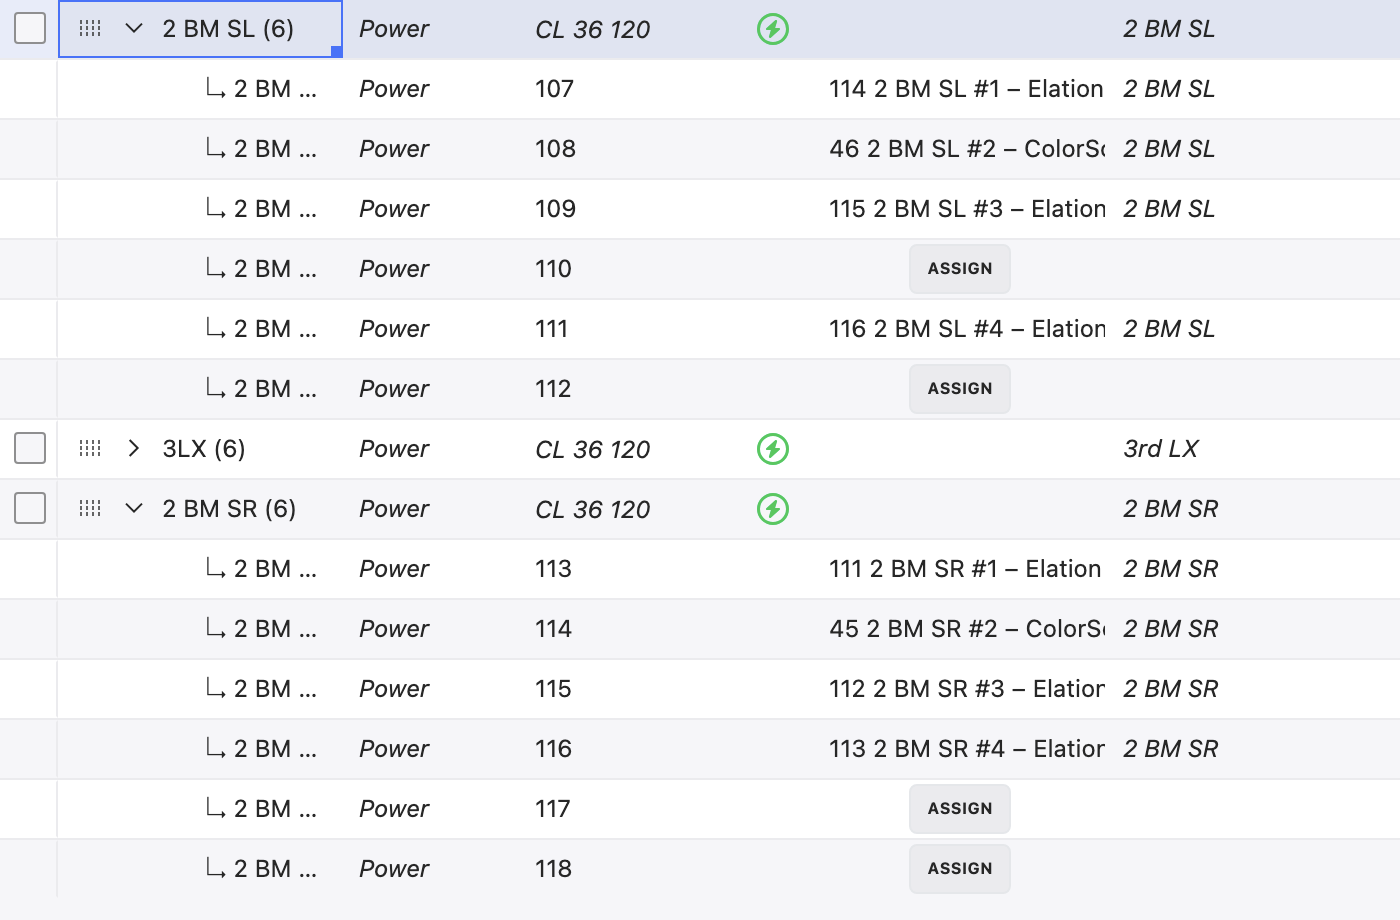
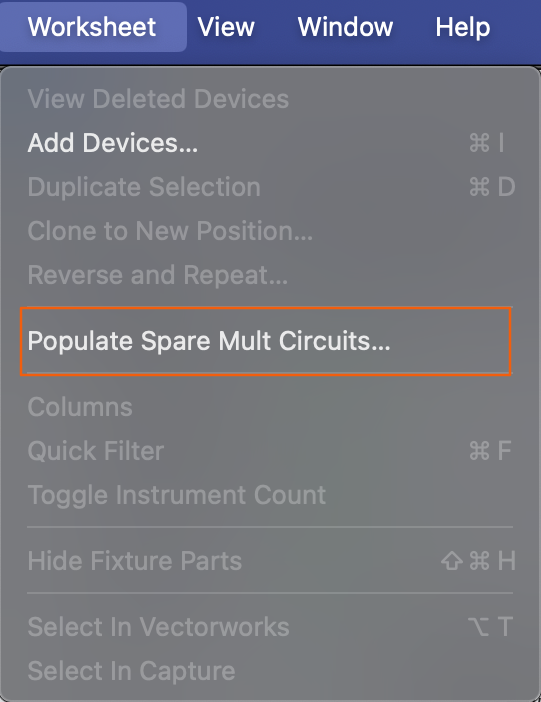
Getting these circuits to be listed in the Worksheet is very easy. Go to Worksheet>Populate Spare Mult Circuits.
A popup opens.
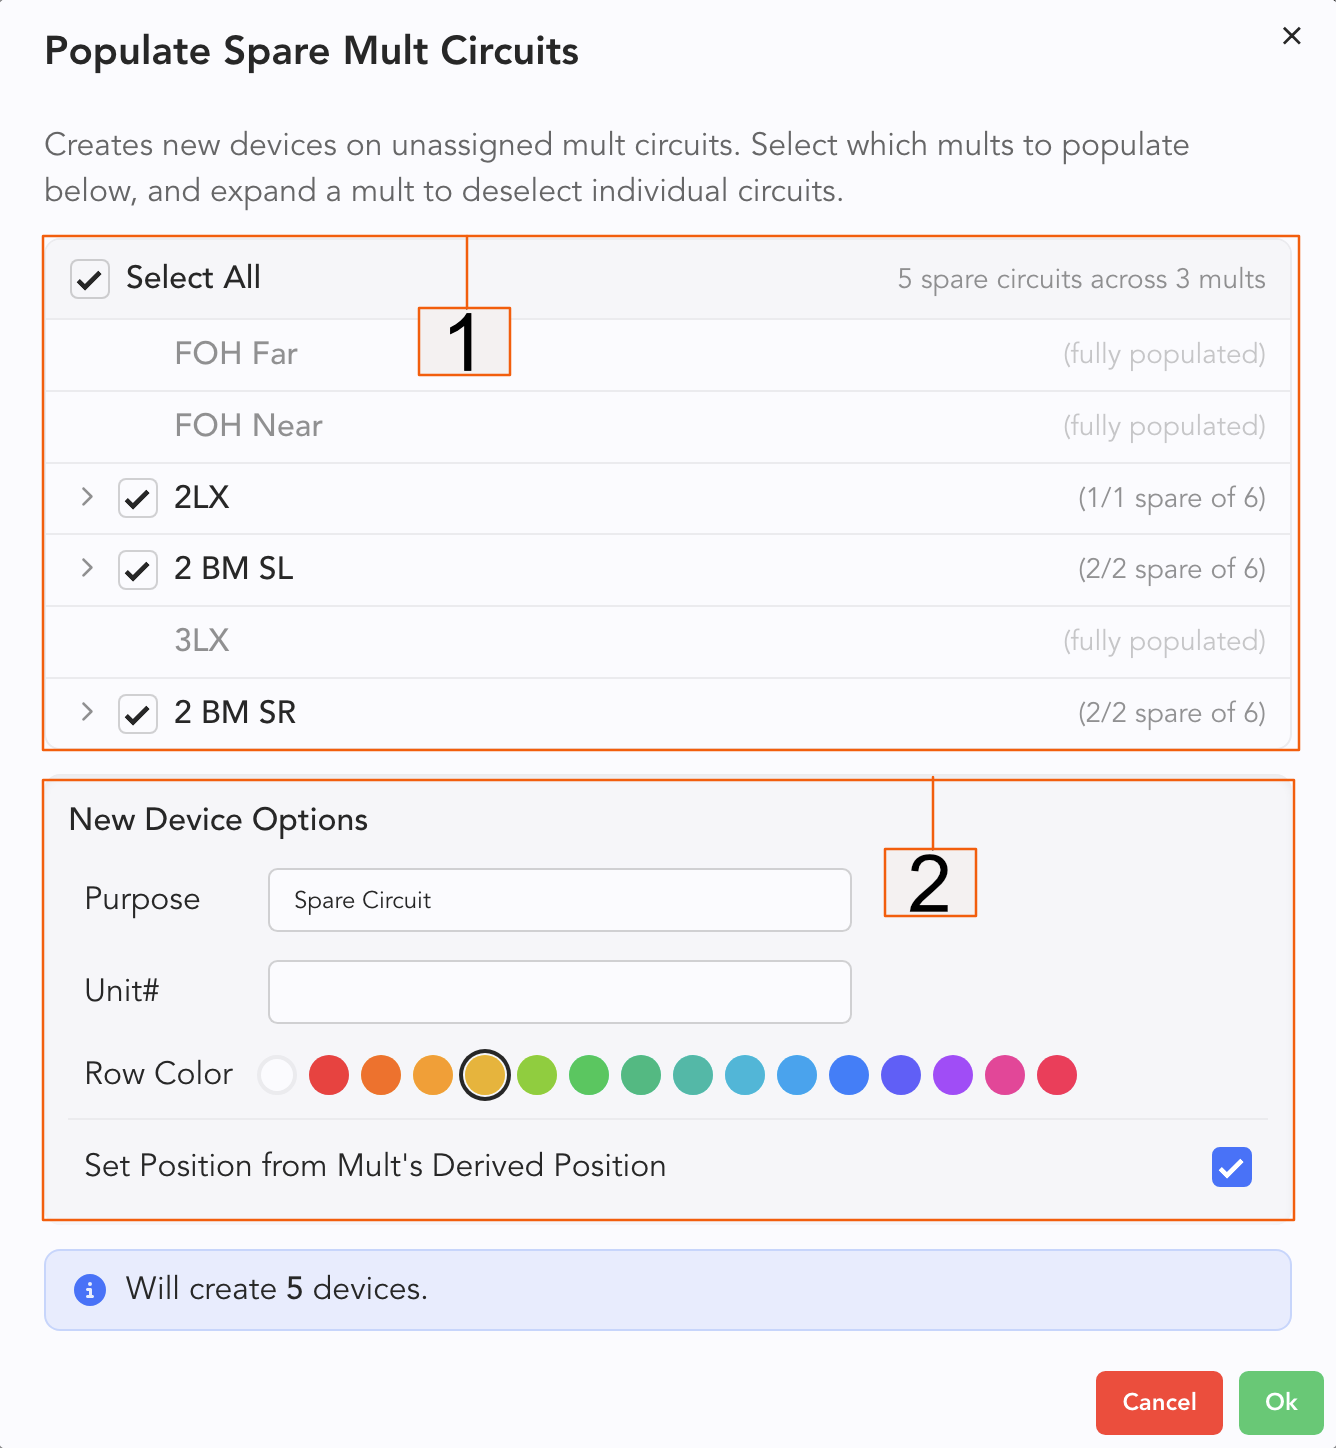
Select or deselect entire Mults or individual circuits to add as Devices.
Customize the Purpose, Unit number (a popular choice is x), assign a row color, and select or deselect Set Position from Mult's Derived Position.
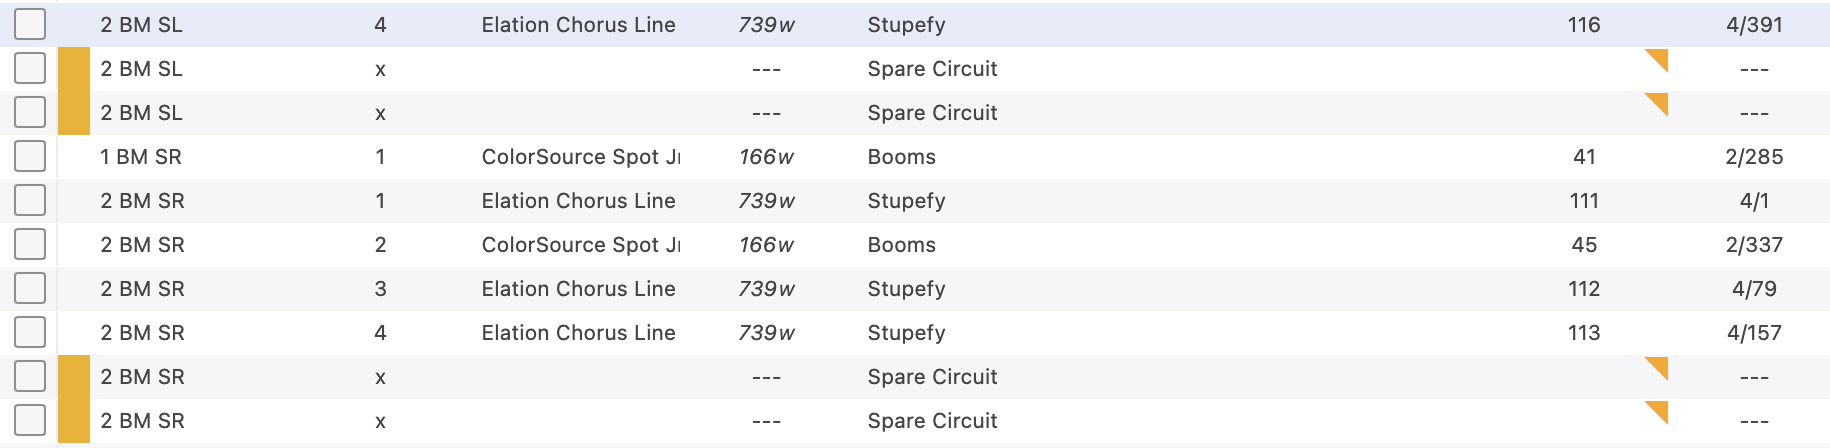
Press Ok when complete. See the added Devices in the Worksheet.
Network Practicum
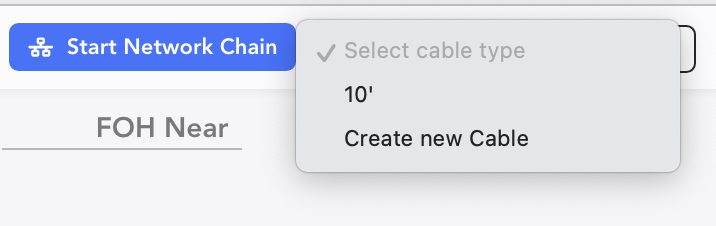
Let's do an example using Network. Touch Start Network Chain, then select items you wish to chain. Here, we've chained 114-116.
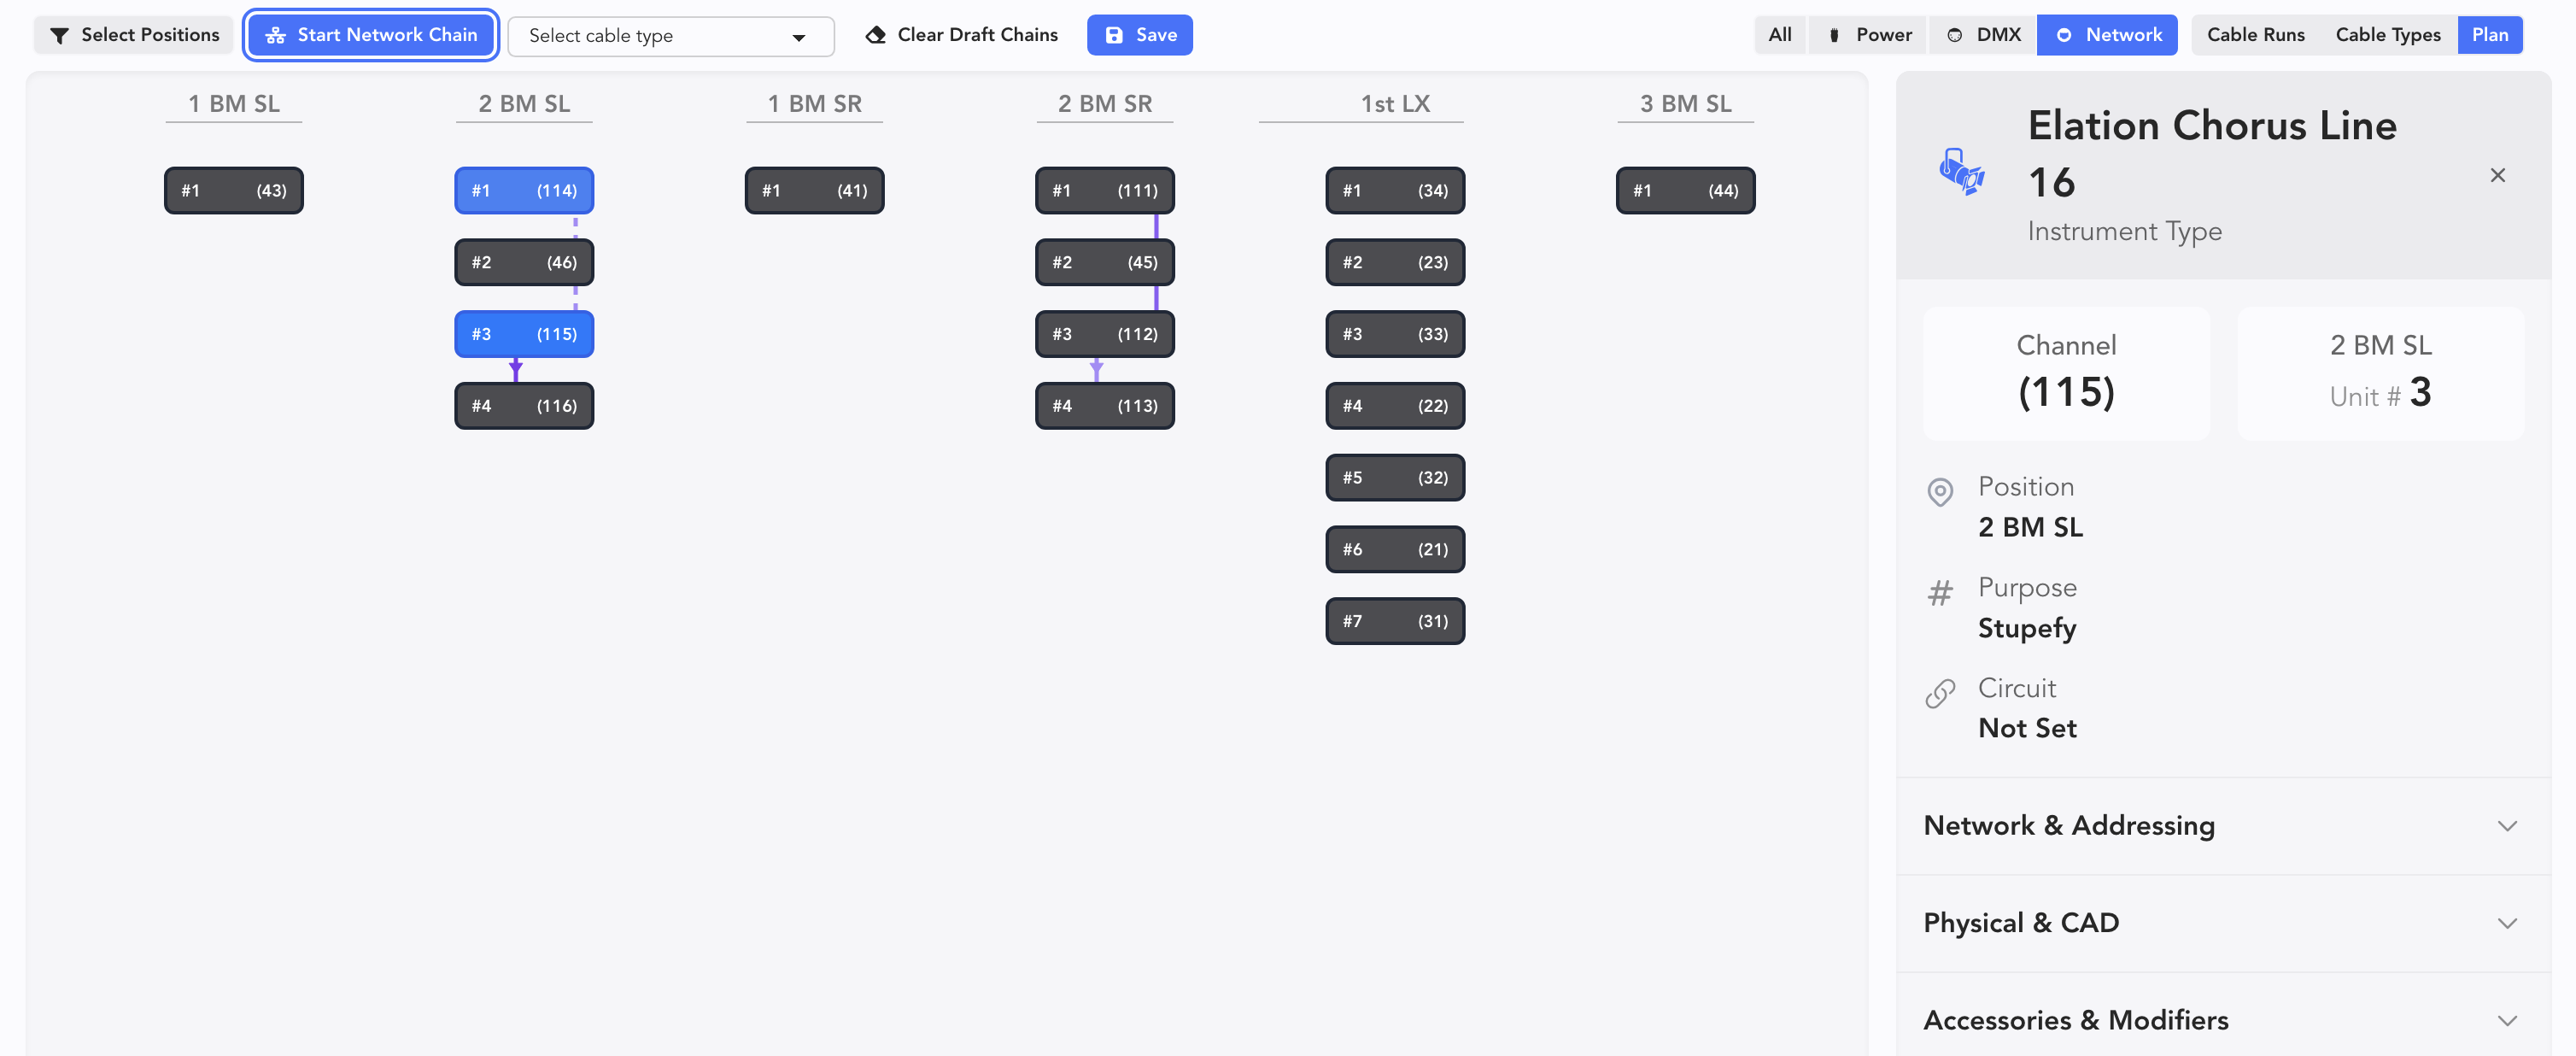
Notice while you are creating a new cable connection of any sort you can choose a pre-existing cable to assign or create a new one from the pulldown.
Once this is done, press Save.
Once you've created a chain, you can select by clicking it. A Side Panel opens.
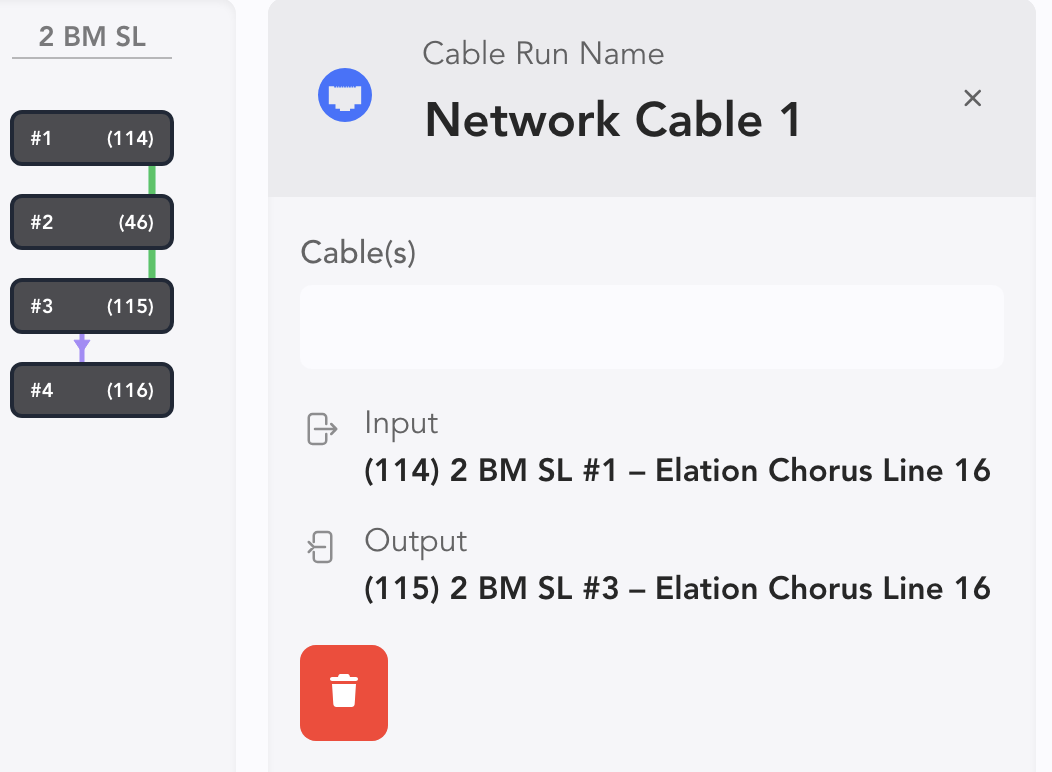
You can fill in cables separated by commas if you have more than one.
Mult Practicum
Let's touch Power in the upper right and then touch New Mult to start a new Mult.  I have an electric with 8 Axioms here. I want to power the whole electric from one Mult. Click on the first light to assign the first circuit of the Mult. Then I press and hold Cmd/Ctrl and click again on the second light to twofer it. I release Cmd/Ctrl and click through the rest of the lights until I get to the last light, where I again press and hold Ctrl/Cmd and click the last light to twofer it into circuit six of the Mult.
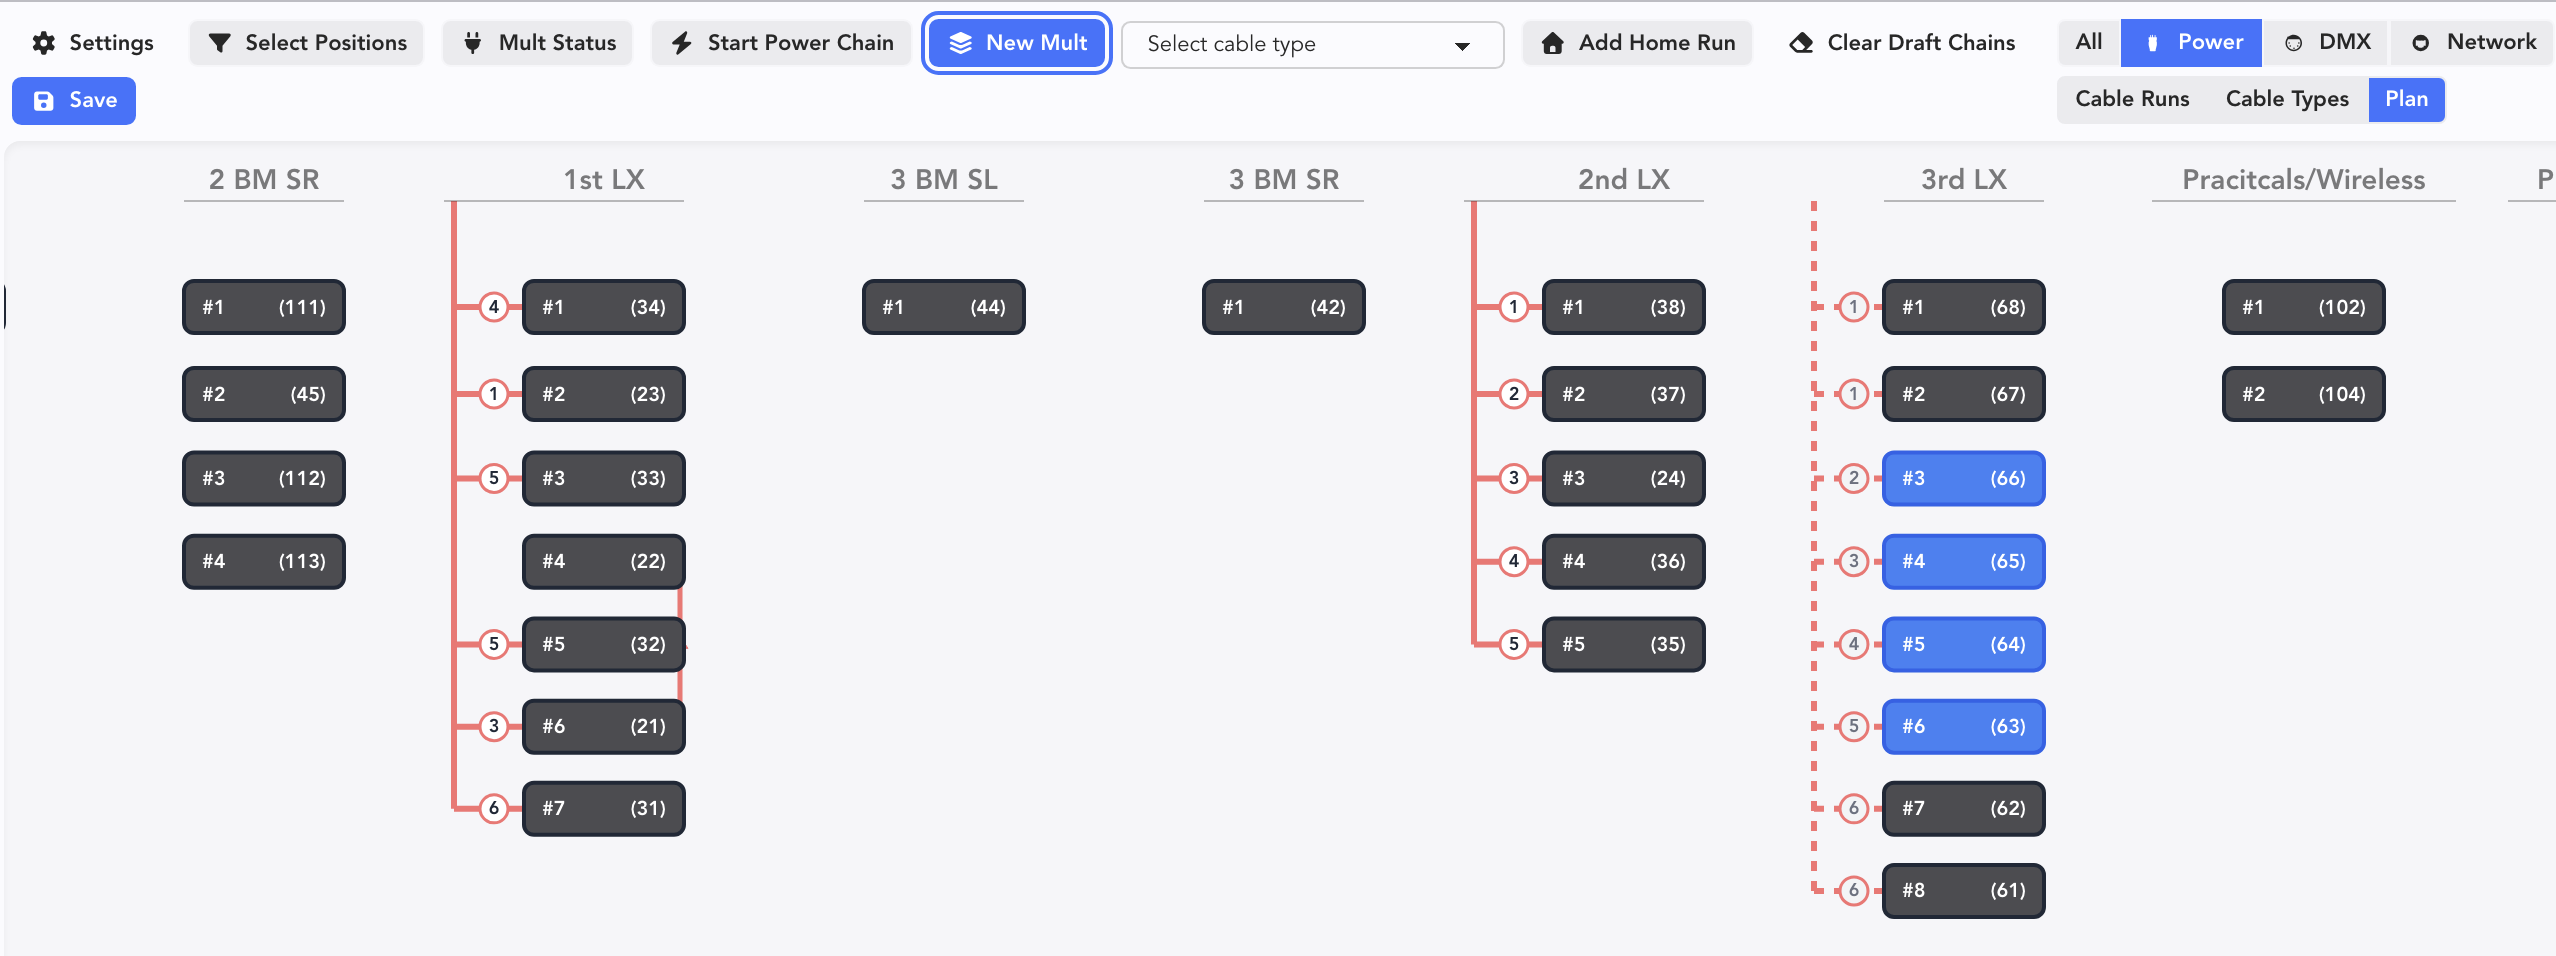
Don't forget to click Save!
TIP
While assigning circuits using New Mult, hitting Spacebar will skip a circuit.
Now that our Mult is created, let's assign it to a port on the Power Distro. Click the Mult line to select and a side panel opens.
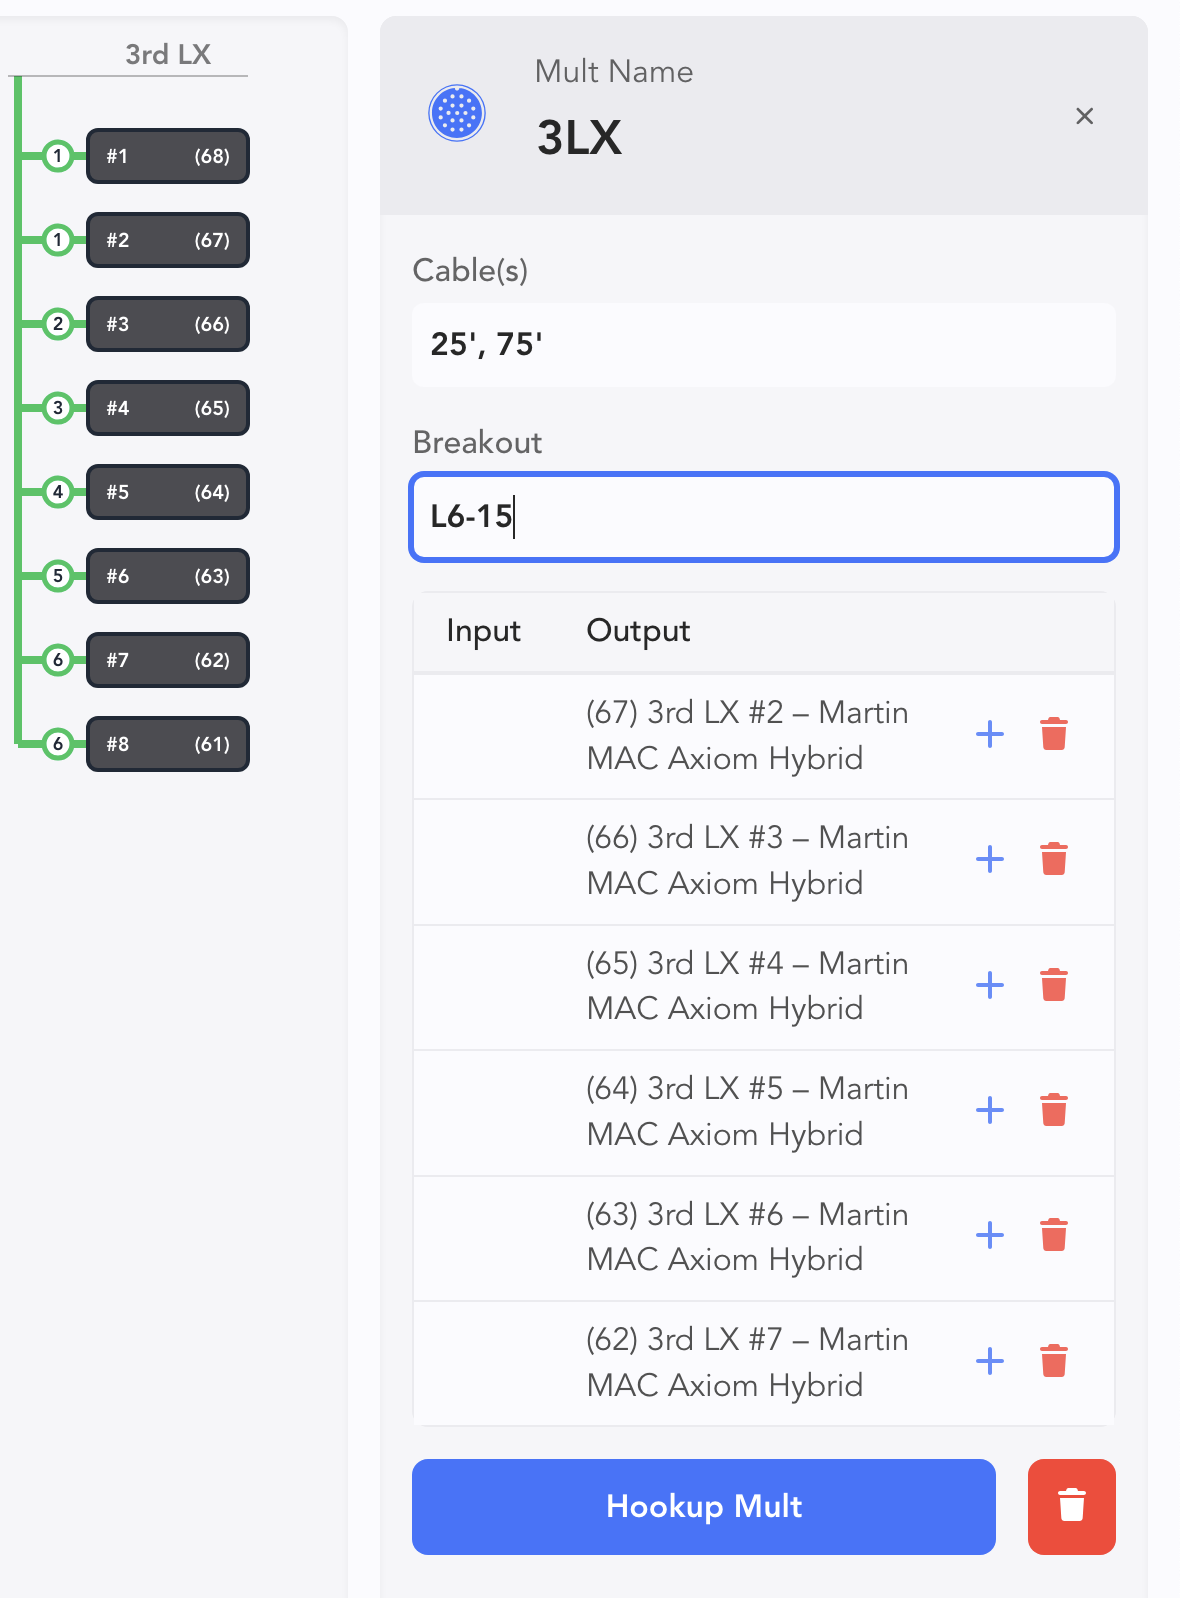
You can name the Mult (3LX here) and write in your cable lengths under Cable(s). Put in your Breakout as well. All of this data is counted and available to reports.
When you are ready to hook up your Mult, touch Hookup Mult at the bottom. A popup appears.
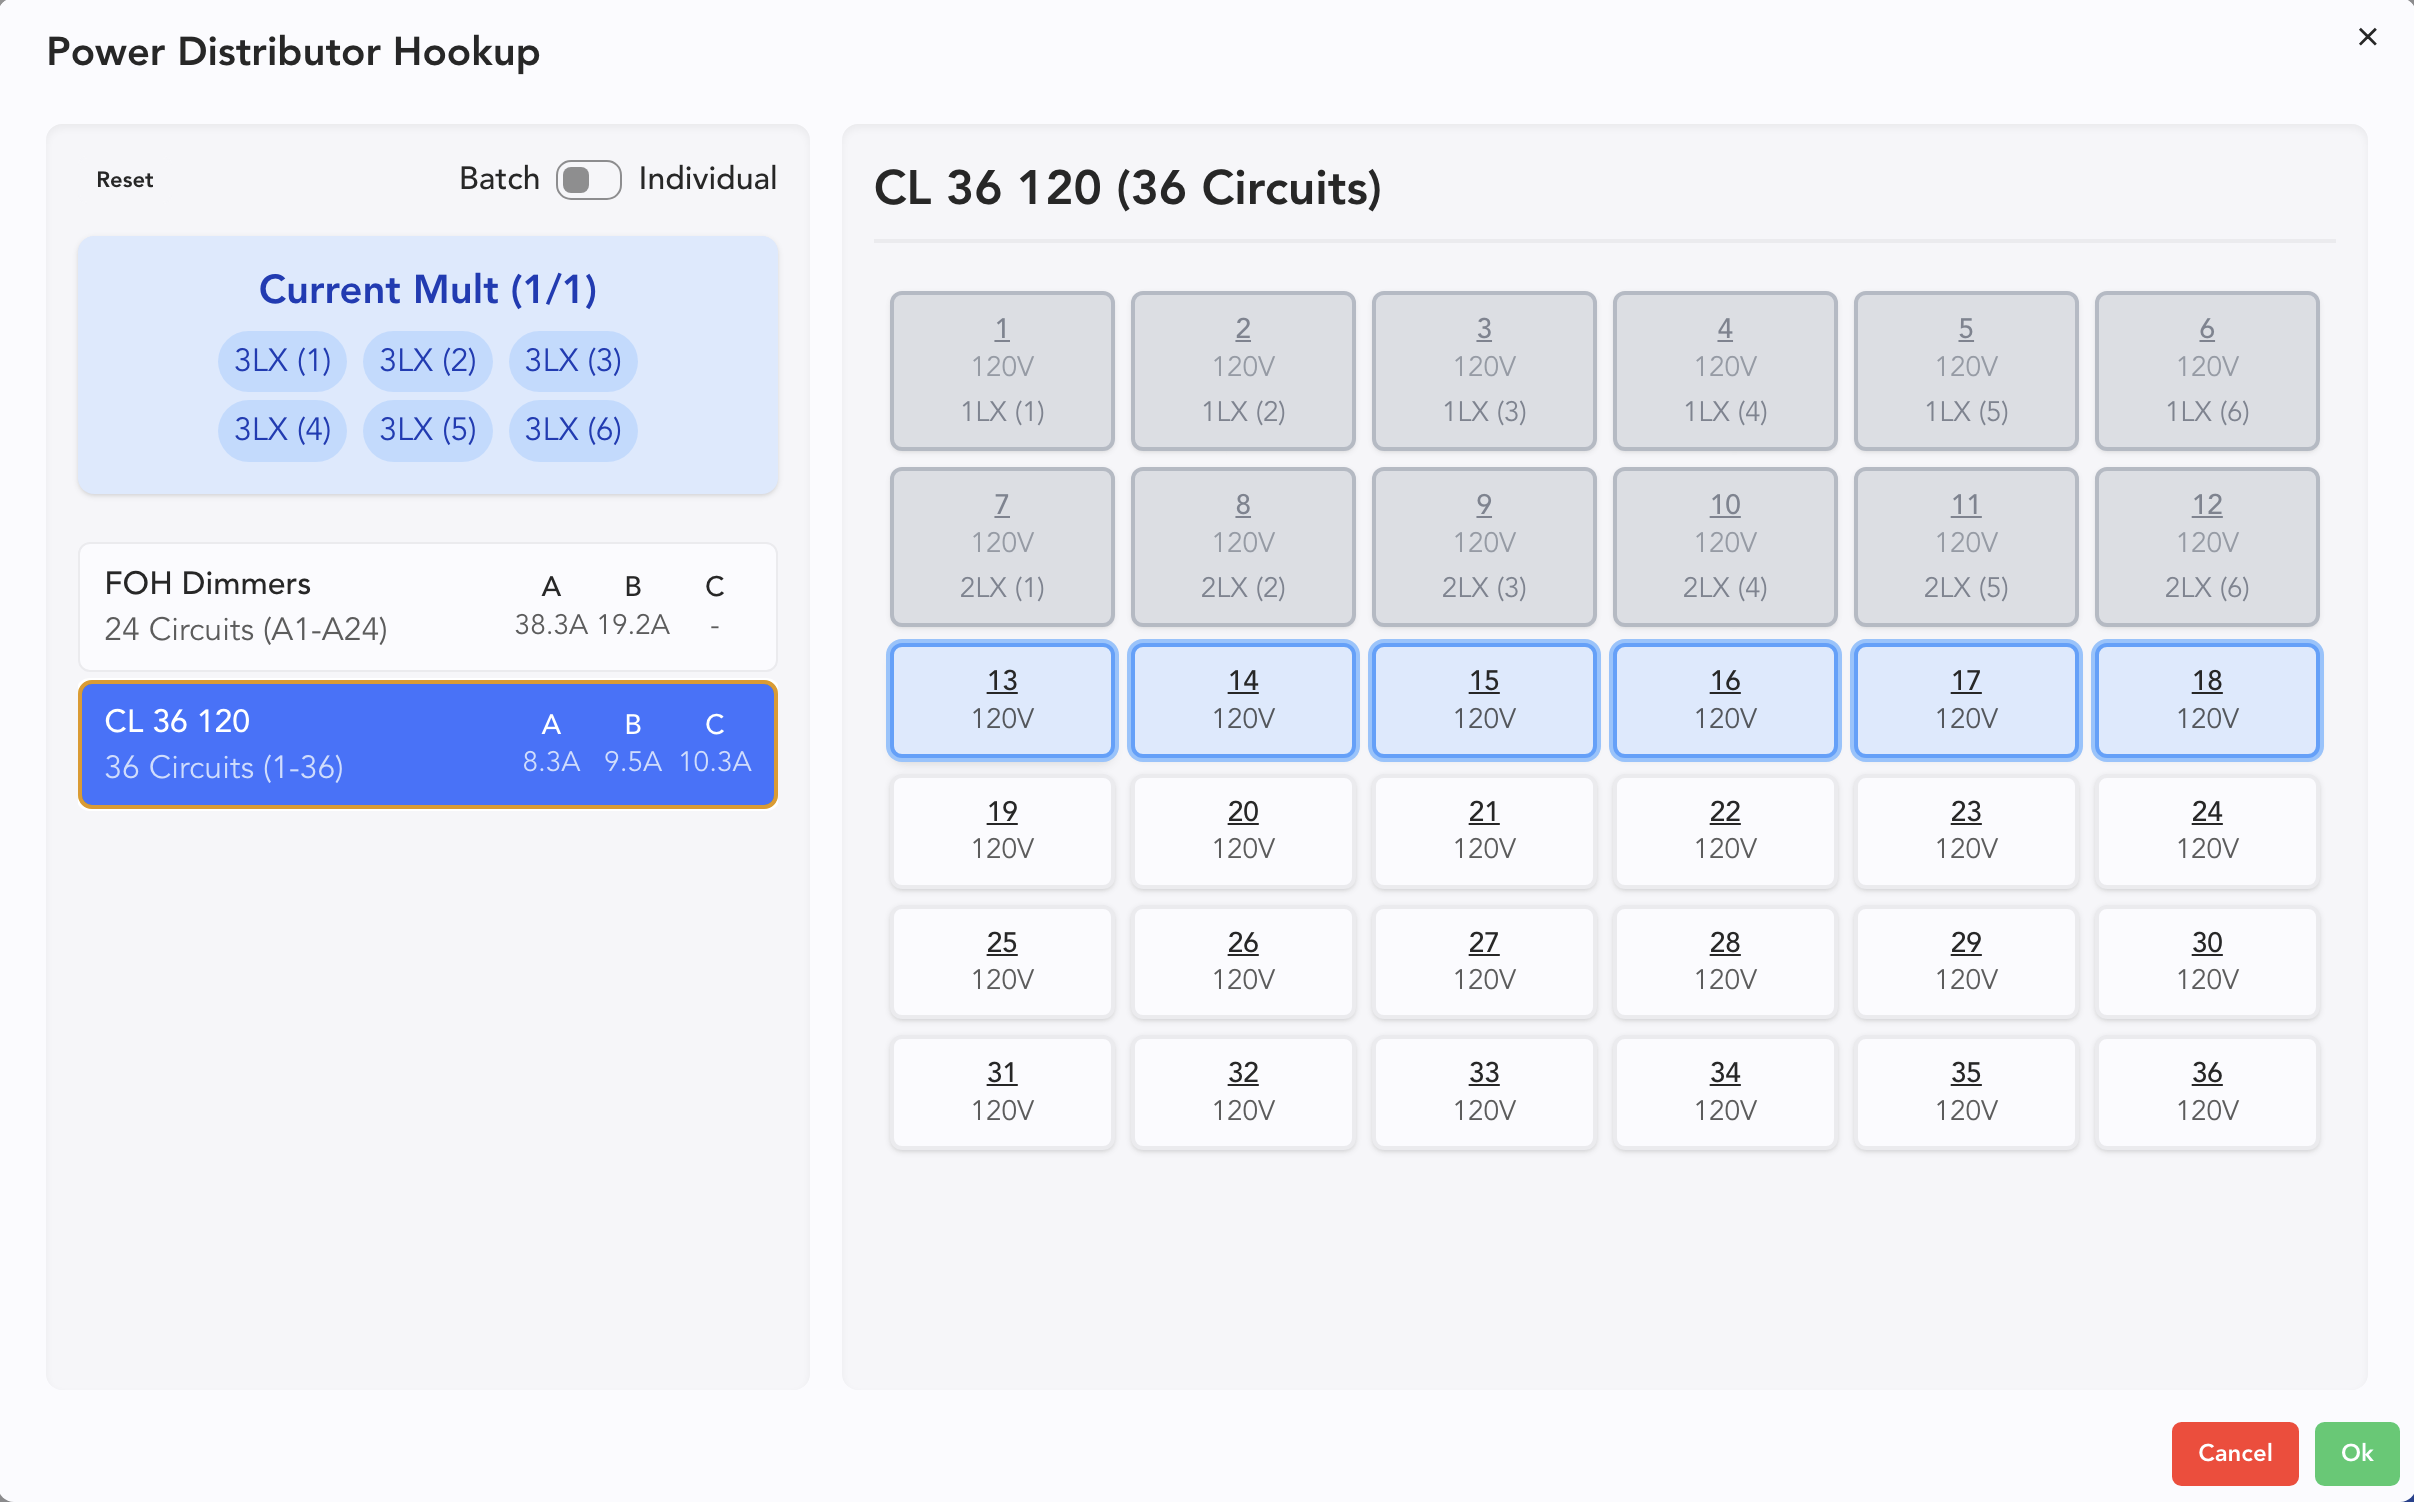
Hovering over any circuit prompts LW to show you the number of circuits your Mult will take.
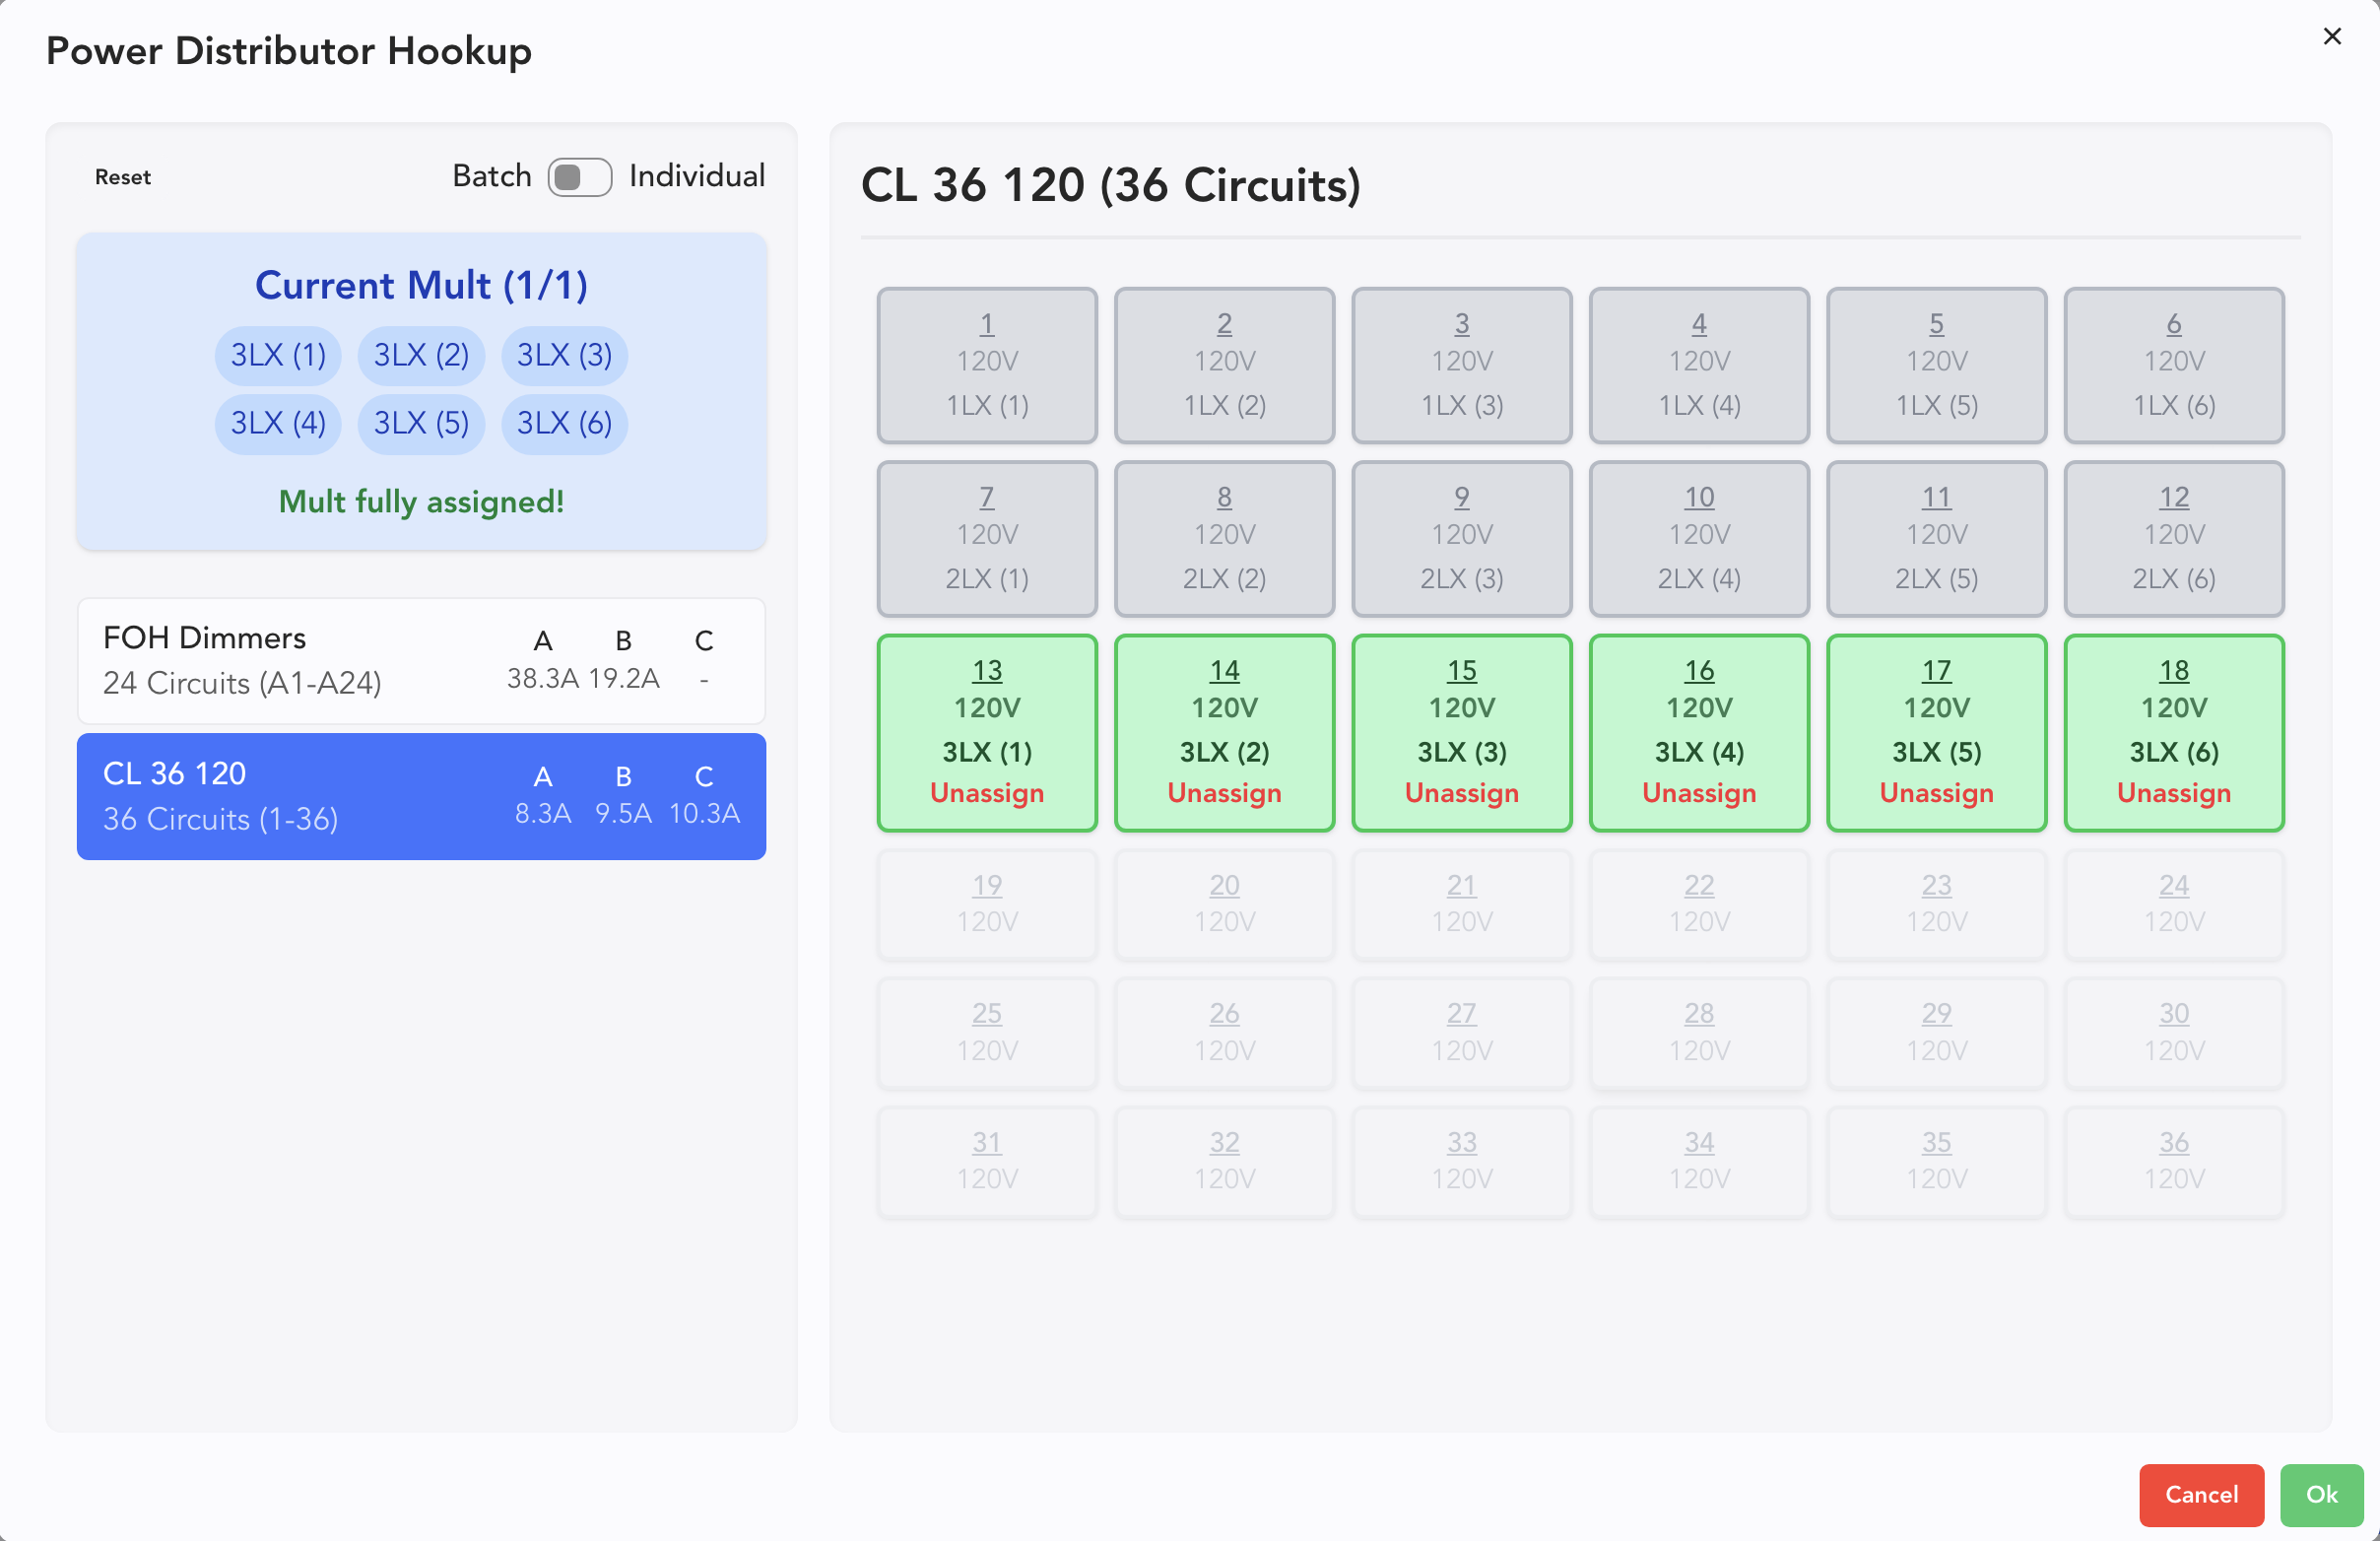
Click to select, then click Ok.
When you go to Power, the connection you just made shows up.

Home Run to Position Practicum
There may be times you want to have Home Runs or other cables sent to a position but not assigned to fixtures. (Perhaps because they are run as spares.) Let's do an example to make this easy.
Switch to Cable Runs.

To select a Home Run, you need to switch to Power-Other.

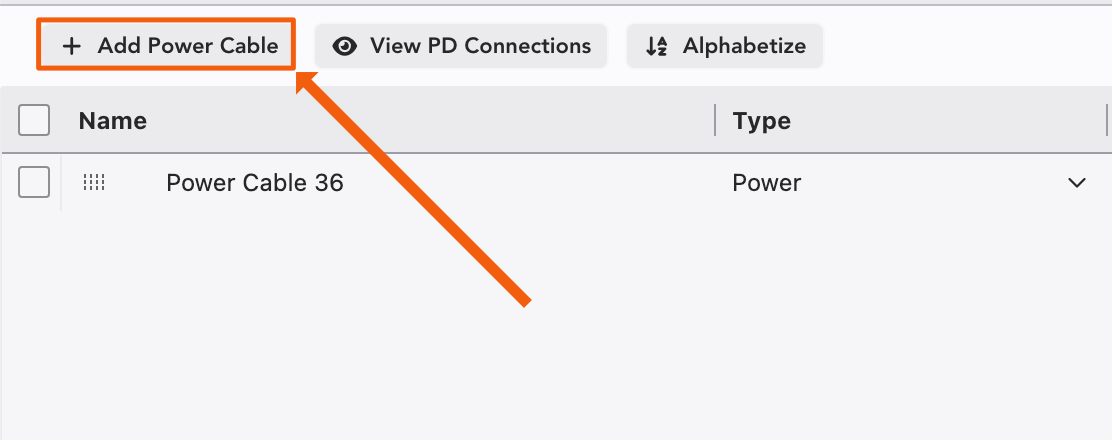
Touch + Add Power Cable in the upper left.
Name your cable. If you wish to assign a circuit, double-click under the From column.

A popup opens. Select the Circuits tab at top.
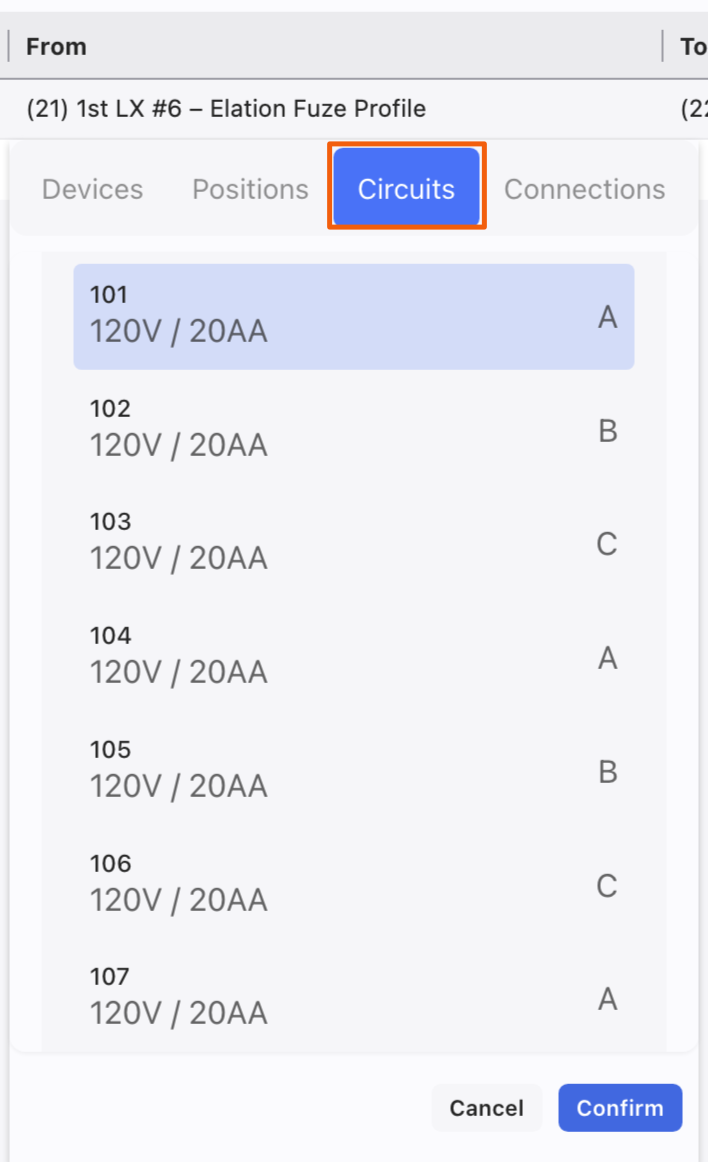
In this example, I'll choose Circuit 101, then press Confirm. Now double-click on the To column. Navigate to the Positions Tab.
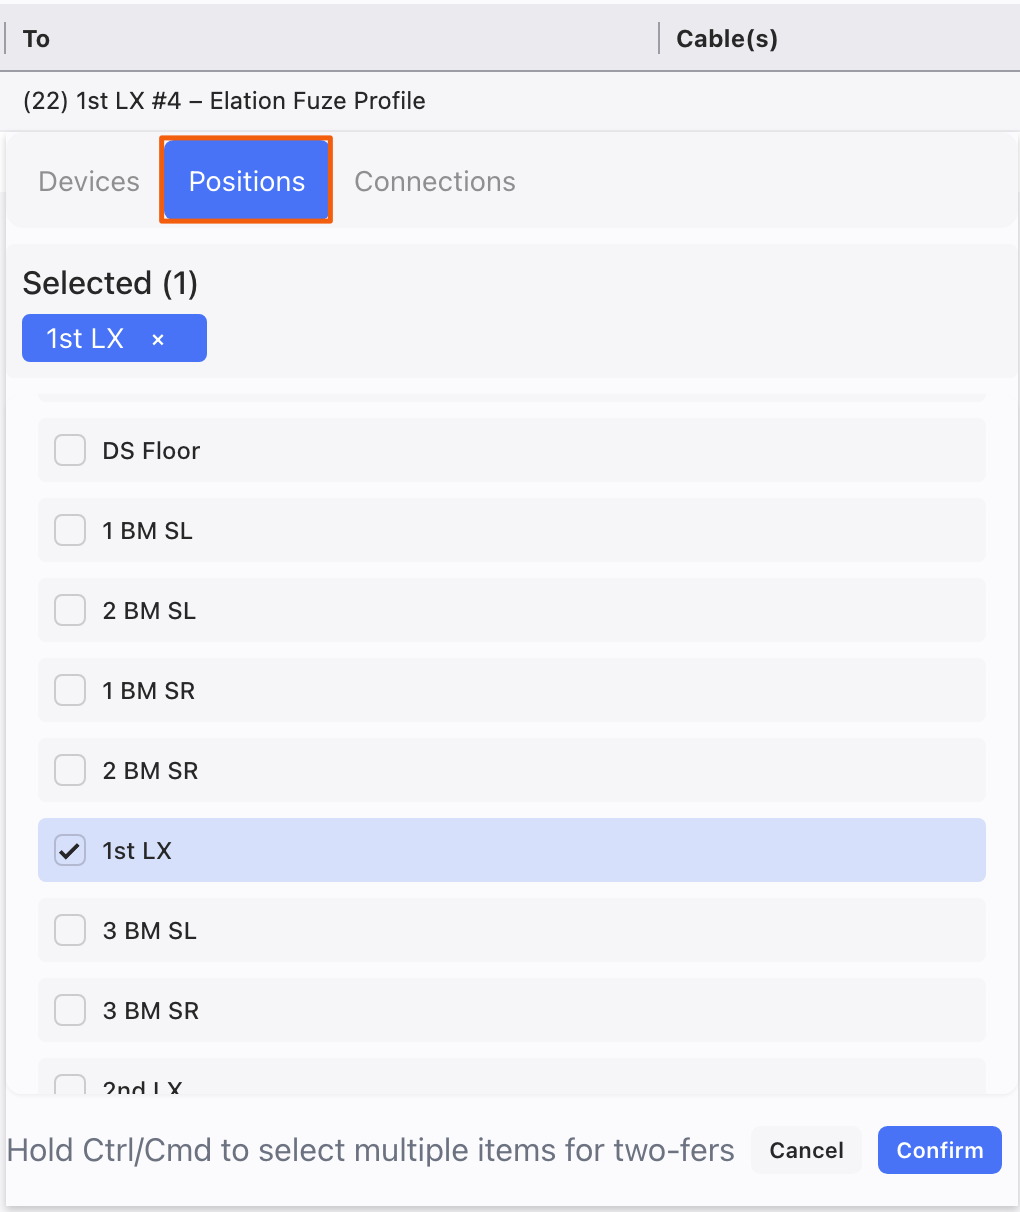
Here, I've chosen the 1st LX. Press Confirm to finish. You can now assign a Cable with the pull-down menu or by typing in a new cable.